How to Temper Chocolate & Make Pralines
I always had a big love for chocolate, of any kind. Unfortunately, chocolate didn’t return the same love, and like almost every other failed love story, somehow you end up with a psychologist who tries to patch you up, but in my case, it was a dentist.
If I remember correctly, I started going to the dentist at the age of 6. Honestly, I loved those visits. On the one hand, it was nice to see Lina, the doctor’s daughter, who always sat and painted in her father’s waiting room (I was a child in love), but on the other hand it was even nicer to know that after the visit I’ll be able to go back home and eat the next chocolate bar.. painless!
At my pastry school “Bishulim” I was taught how to take my love for chocolate to the next level. I learned that chocolate is spoiled, loves to stay in motion at all times, and is sensitive to heat and humidity.
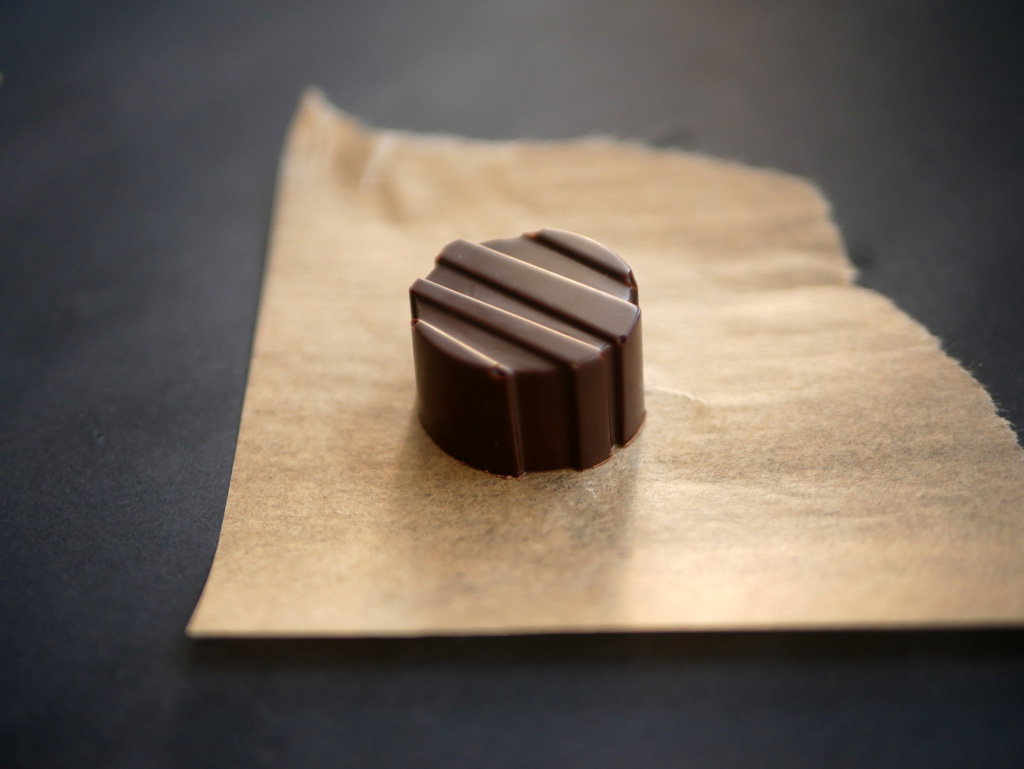
Store-bought chocolate is already tempered. Such chocolate has a shiny look, doesn’t easily melt or leave marks when touched and has a crackling sound when broken (if stored in the right conditions). When chocolate is melted, and then chilled back, it will not keep these qualities unless it is tempered properly.
Chocolate contains cocoa butter that consists of stable and unstable crystals. What gives chocolate these wonderful attributes are the stable crystals. Tempering helps express the majority of these crystals in chocolate and less so the unstable ones.
Tempering consists of three stages:
- Heating the chocolate until all crystals dissolve.
- Chilling the chocolate to the point where all crystals begin to crystallize back.
- Heating the chocolate again to dissolve unstable crystals only (this is possible due to the fact that unstable crystals melt at relatively low temperatures, 15-28°C (59-82°F), compared to stable crystals that melt at higher temperatures, 32-34°C (90-93°F)).
There are a number of different methods to temper chocolate. I will elaborate on three of them. No matter which method you choose, the chocolate will come out tempered eventually, as long as you go carefully about the process and make sure the room is dry and cool (22-23°C).
At the end of the tempering process, before you start working with the chocolate, it is recommended to perform a small test to avoid crying over spilt processed milk. Take a piece of baking paper or the tip of a knife and cover it with a thin layer of chocolate. If in 3-4 minutes the chocolate hardens and looks smooth, then it is ready to use. If not, you’ll have to temper it again.
When working with chocolate, it’s important to keep it within the tempering temperature range by briefly heating it occasionally on a double-boiler, otherwise it will harden and then it will have to be tempered yet again.

Chilling on marble
This is the method I learned in baking school. Most of the confectioners use it. The idea here is to chill melted chocolate on a cold surface (such as marble) while keeping it in constant movement. This method requires the use of a wide spatula and a big frosting spatula and it can leave quite a messy kitchen. It requires some practice to get used to it.
…
First, make sure the work surface is thoroughly clean and dry from water.
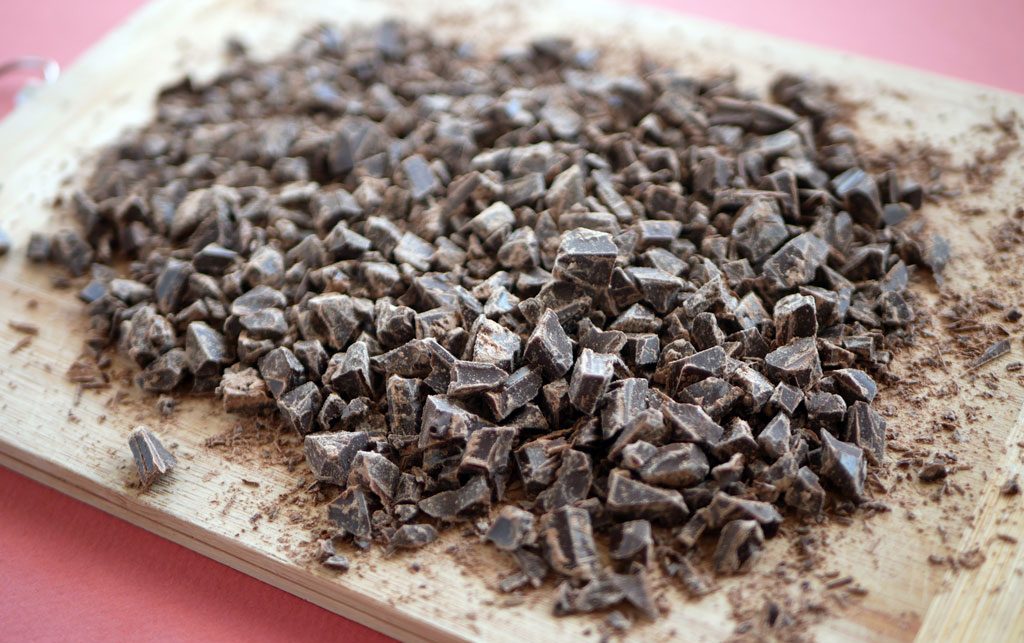
Break or cut chocolate into small pieces and put in a stainless steel bowl (not glass! Glass bowls absorb heat and may affect the process, talking from bitter experience here). Melt the chocolate on a double-boiler while stirring gently. You should get the temperature to 50-55 °C (122-131 °F) for dark chocolate and 48-50 °C (118-122 °F) for milk and white chocolate.
Remove from heat and wipe the water from the bottom of the bowl. Pour about 80% of the melted chocolate over a cold marble surface. Spread the chocolate to a thin layer with the wide spatula, collect back from the edges to the center and pile the chocolate using the wide spatula and the frosting spatula (which helps remove the chocolate residue from the wide spatula). Repeat the process until the chocolate becomes viscous (at this point the temperature should be 28-29°C (82-84 °F) for dark chocolate, 27-28°C (81-82 °F) for milk chocolate and 26-27°C (79-81 °F) for white chocolate, but there’s no need to measure it here).
Collect the chocolate and transfer it immediately to the bowl containing the remaining melted chocolate. Mix well until all the chocolate is in melted form.
This will bring the chocolate to its temper point, which is 31-32°C (88-90 °F) for dark chocolate, 29-30°C (84-86 °F) for milk chocolate and 28-29°C (82-84 °F) for white chocolate. If the temperature is a little high (though not more than 34.5°C / 94 °F) wait for it to come down. If it’s too low, reheat carefully on a double-boiler until the desired temperature is reached. Important! Do not exceed 34.5°C/ 94 °F when reheating, otherwise you will have to temper the chocolate all over again.


Seeding
This is a relatively fast and clean method. It is usually used for small quantities of chocolate or at the lack of a marble surface and tools suitable for tempering. In this method, stable crystals are added into the melted chocolate, so the chocolate must be bought already tempered.
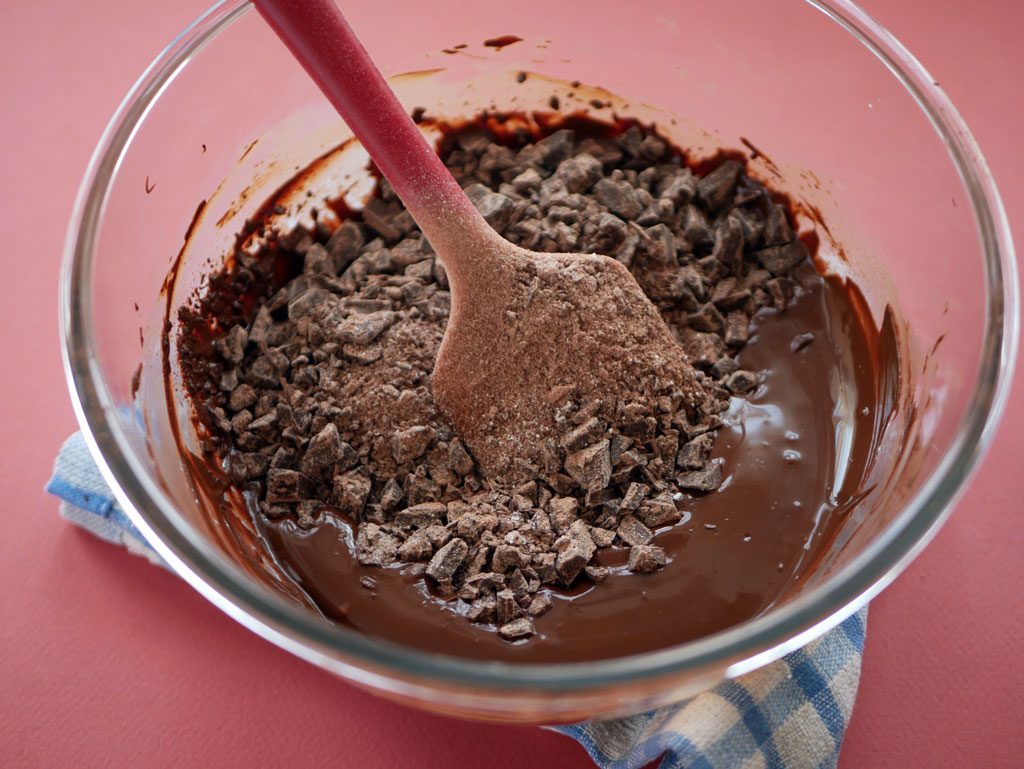
Using a sharp knife, chop a 1/3 of the chocolate into small pieces and put aside.
Break the remaining 2/3 of the chocolate into tablets, put in a stainless steel bowl (not glass) and melt over a double-boiler while stirring gently. You should get the temperature to 50-55 °C (122-131 °F) for dark chocolate and 48-50 °C (118-122 °F) for milk and white chocolate.
Remove from heat and wipe the water from the bottom of the bowl. Add the chopped chocolate to the melted chocolate gradually. Mix well each time until all chocolate has been dissolved before adding more. Also, check the temperature each time. If it reaches the temper point, stop seeding and pull out any chunks of chocolate that haven’t melted yet.
The temper point is 31-32°C (88-90 °F) for dark chocolate, 29-30°C (84-86 °F) for milk chocolate and 28-29°C (82-84 °F) for white chocolate. If the temperature is too low, reheat carefully on a double-boiler until the desired temperature is reached. Important! Do not exceed 34.5°C/ 94 °F when reheating, otherwise you will have to temper the chocolate all over again.

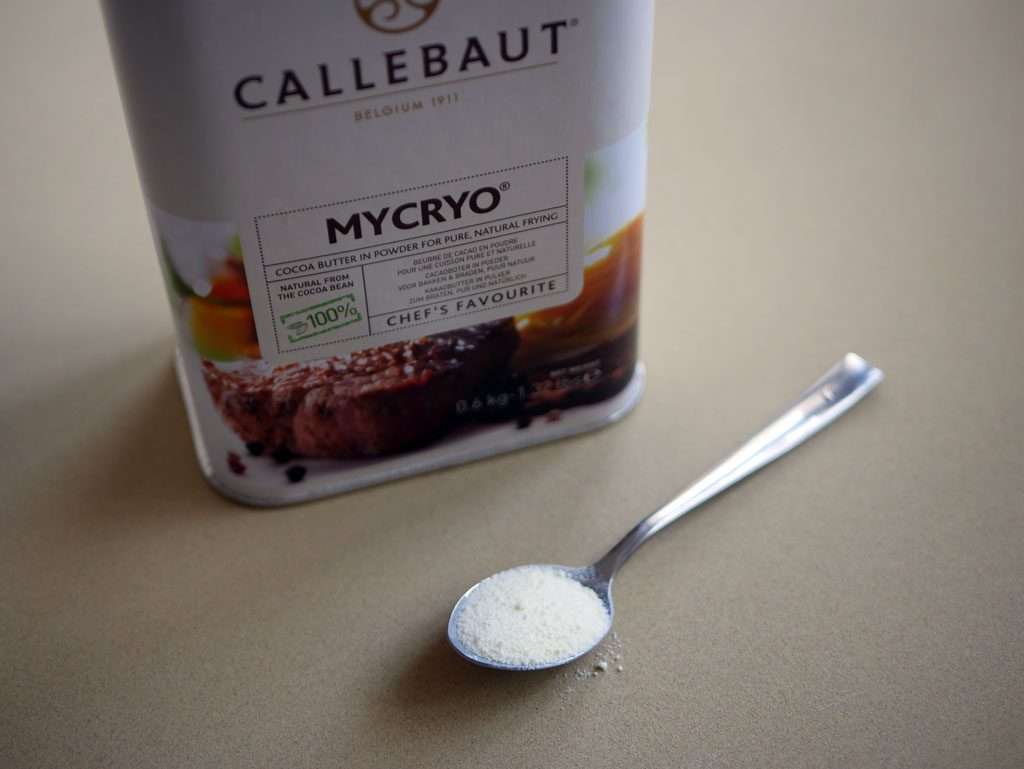
Powdered cocoa butter (Mycryo)
This is the simplest but yet the most expensive method. Cocoa butter in powder, or “Mycryo” as it’s sometimes called, is not easy to come by. However, as soon as you put your hands on it, it’s hard to go back and temper using the other methods. This is actually direct seeding of cocoa butter that is rich with stable crystals. Here, too, the chocolate must be bought already tempered (You also need a precision digital scale).
Break or cut chocolate into small pieces. Put in a stainless steel bowl (not glass) and melt over a double-boiler while stirring gently. You should get the temperature to 50-55 °C (122-131 °F) for dark chocolate and 48-50 °C (118-122 °F) for milk and white chocolate.
Allow the chocolate to chill back to 35 °C / 95 °F. Add 1% Mycryo powder (for example, if you’re using 200 g chocolate, you should add 2 g powder) and mix well.
Let the chocolate reach its temper point, which is 31-32°C (88-90 °F) for dark chocolate, 29-30°C (84-86 °F) for milk chocolate and 28-29°C (82-84 °F) for white chocolate.
If the temperature is too low, reheat carefully on a double-boiler until the desired temperature is reached. Important! Do not exceed 34.5°C/ 94 °F when reheating, otherwise you will have to temper the chocolate all over again.
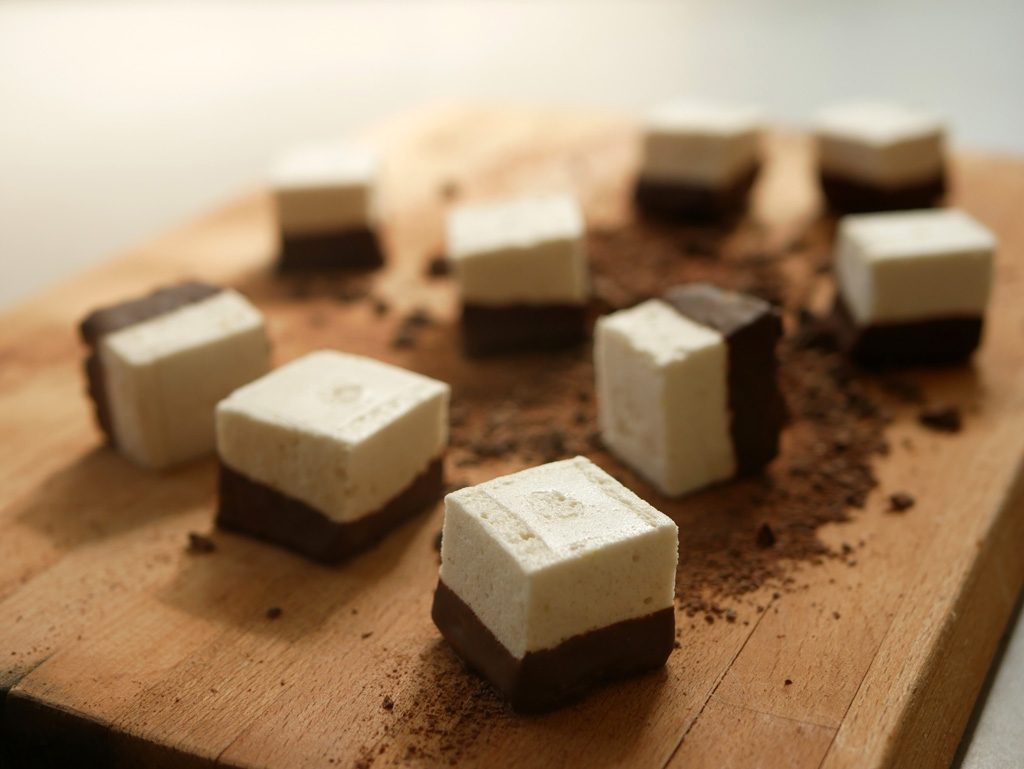
Pralines
For best results, it is recommended to use a polycarbonate mold. Before you begin, clean the mold thoroughly with water and a soft sponge (be careful not to scratch it). Dry the mold with a kitchen towel. For a more serious clean-up, use alcohol.
Note: For a 21 socket mold (2.5 cm diameter each), you should use 300 gr chocolate.
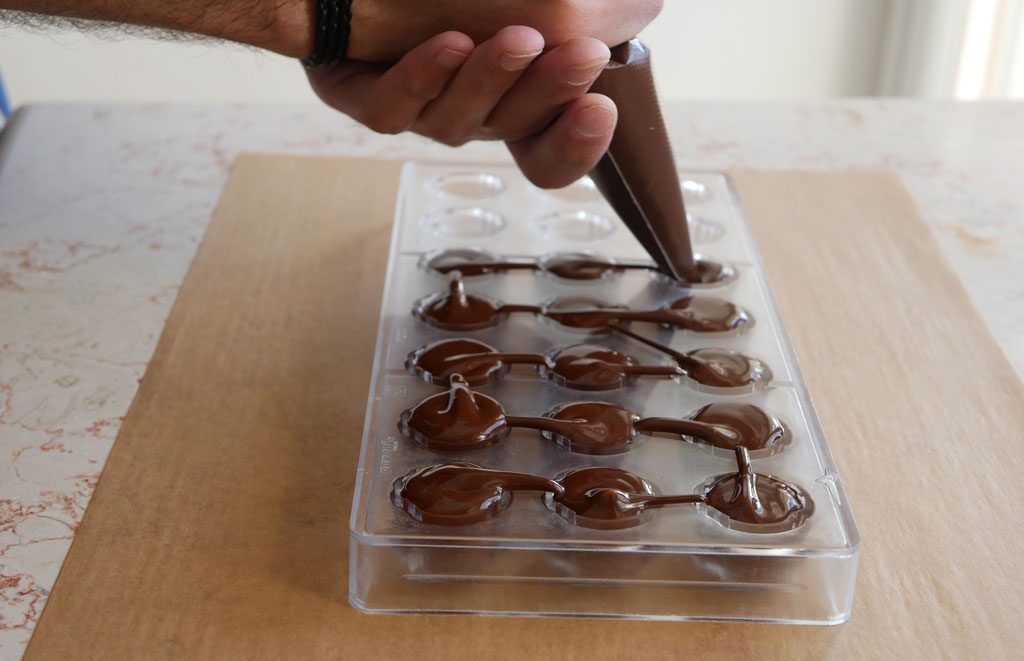
Fit a pastry bag with a 10 mm smooth tip and fill it with tempered chocolate. Quickly fill all the sockets in the mold. Tap the mold lightly on the surface to get rid of air bubbles.
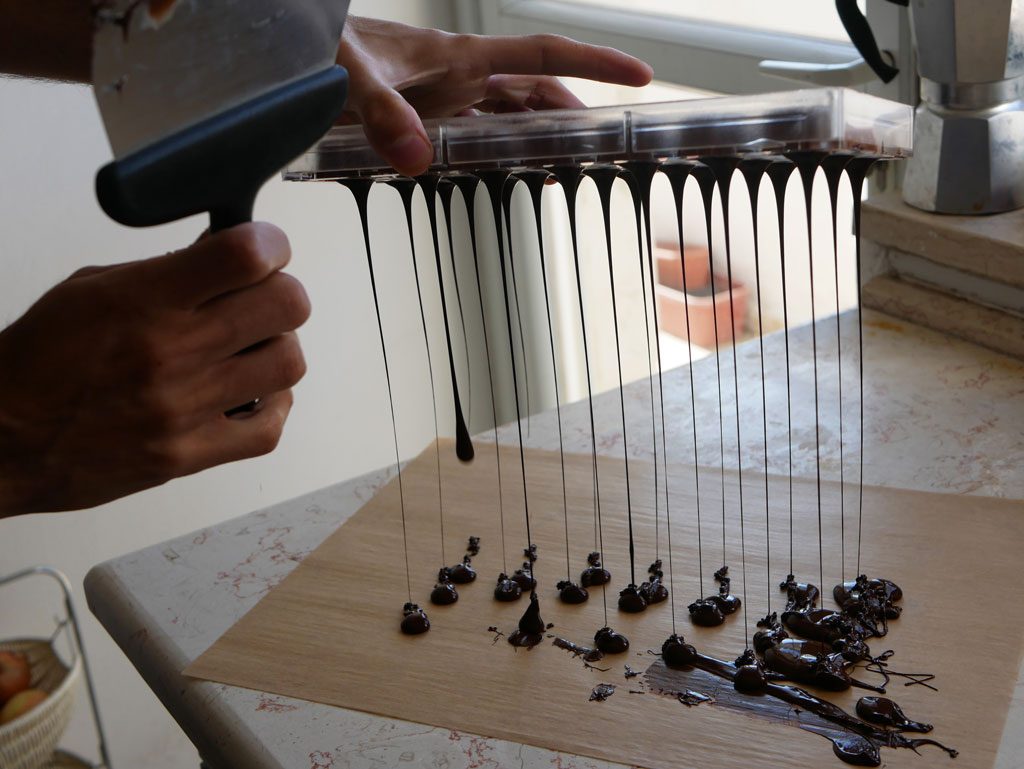
Turn the mold over and let the chocolate drip onto the surface (or onto a baking paper for an easy assembly once the chocolate has set) while tapping on the side of the mold with a wide spatula. At the end of the process you should get nice thin layer of chocolate in the sockets. Turn over the mold quickly and clean the excess chocolate using the wide spatula. Keep aside to let the chocolate set and start preparing the filling.

Caramel and hazelnut filling
Sweet, bitter and crunchy in one little bite. This recipe requires handling caramel. It might sound complicated, but once you get the hang of it you’ll see that it’s not such a big deal.
Caramel
45 g heavy cream
1 g coarse salt
15 g glucose
90 g sugar
75 g soft butter cut into cubes
+ 21 hazelnuts, peeled and sliced in half
Bring the heavy cream to a boil. Remove from heat, add coarse salt and keep aside.
Put glucose in a medium saucepan. To avoid a sticky situation, first, wet the tips of your fingers with water, then grab some of the glucose and transfer it to the saucepan (which should be set on a scale to know how much glucose you’re putting in).
Add half of the sugar to the saucepan and put on medium heat. Do not mix with a spatula while heating, just tilt the pot occasionally to mix it a little.
When the sugar starts to dissolve and some spots begin to darken and bubble, lower the flame and sprinkle the rest of the sugar, gradually, on the bubbly spots. Do this until the rest of the sugar has been transferred into the saucepan. Keep on low heat until all the sugar has melted and transformed into a light brown liquid (towards the end of the process you can use a spatula to gently mix sugar spots that are not yet dissolved to speed things up).
Remove from heat and gradually add the warm heavy cream while mixing with a whisk (be careful from the hot steam). Add the butter cubes (make sure the butter is at room temperature) and stir until melted. Blend with a hand mixer for a smooth texture. Transfer the caramel to a bowl and cover the surface with plastic wrap. Keep in room temperature for half an hour until it cools slightly.
…
Fit a pastry bag with a 5 mm smooth tip and fill it with caramel. Fill all the sockets in the mold, up to 5 mm from the edge. Place one sliced hazelnut in each socket and push it slightly inside the caramel.
Re-temper the remaining chocolate. Pour it on one side of the mold and spread the chocolate all over the mold using a wide spatula. Tap the mold lightly on the surface, clean the excess chocolate between the sockets and make sure they are all covered well. Keep aside and let the chocolate set. (Or keep it in the freezer for about 5 minutes to speed up the process)
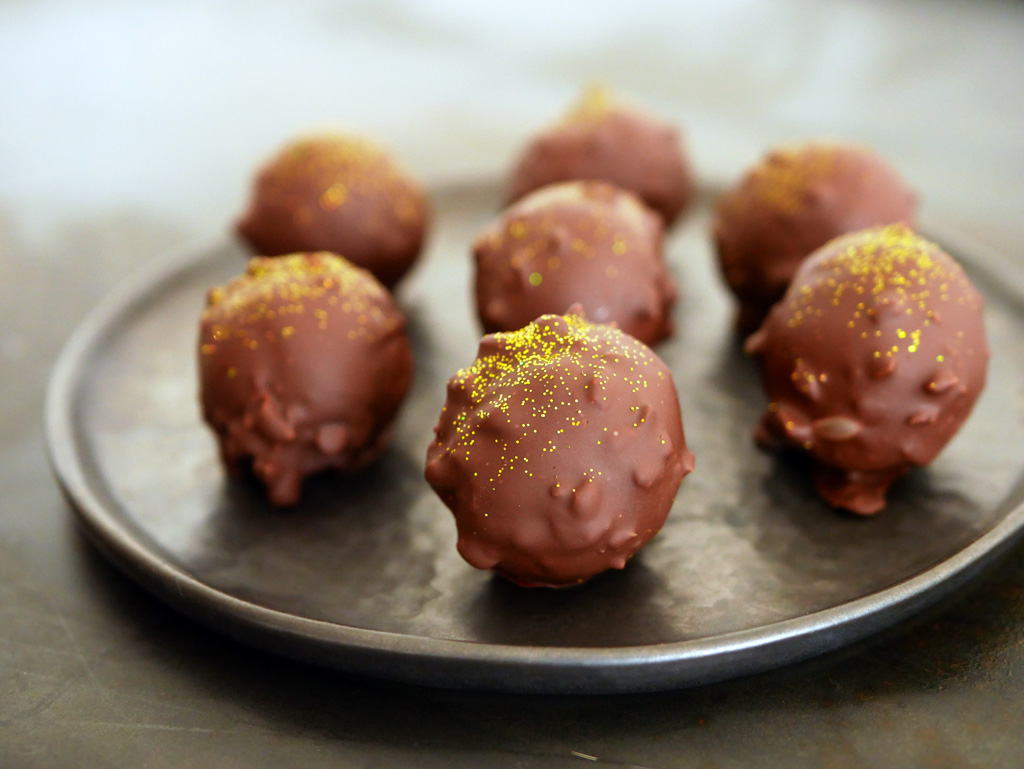
To release the pralines, turn over the mold and tap it lightly on the surface. The pralines should slip out easily (if the tempering was done properly).

Amarena cherries filling
A simple filling, no preparation needed. It’s sweet and it drips lusciously from every bite. I used preserved cherries in syrup by Amarena Fabbri .
Place a whole cherry in each socket of the mold. If the cherry is sticking up out of its socket, cut it a little bit so it fits perfectly inside. Fill each socket with a bit of syrup (fill just one third/half of the socket, not more).
Re-temper the remaining chocolate. Pour it on one side of the mold and spread the chocolate all over the mold using a wide spatula. Tap the mold lightly on the surface, clean the excess chocolate between the sockets and make sure they are all covered well. Keep aside and let the chocolate set. (Or keep it in the freezer for about 5 minutes to speed up the process)
To release the pralines, turn over the mold and tap it lightly on the surface. The pralines should slip out easily (if the tempering was done properly).


Tried my first attempt at tempering white chocolate today (used it to make bark with toasted almonds and dried cranberries). It came out beautifully with the seeding method. Left it to cool naturally (no fridge) and it hardened well with a nice gloss even though the room was a bit warm. Very satisfying!
Amazing! I’m so glad to hear it helped 🙂
And that bark sounds delicious!
I love, love your blog.
It is everything I love in baking. From chestnut to Nutella and more…
Your recipes are magical. And I mean it.
There are so many blogs but you are unique.
You are baking blog musician…like baking Amadeus Mozart.
Love and hugs
from 5 star cookies
Hi Stefani, wow, you just made my day.. heck, my week!
Seriously, what a compliment. Thanks so much 🙂