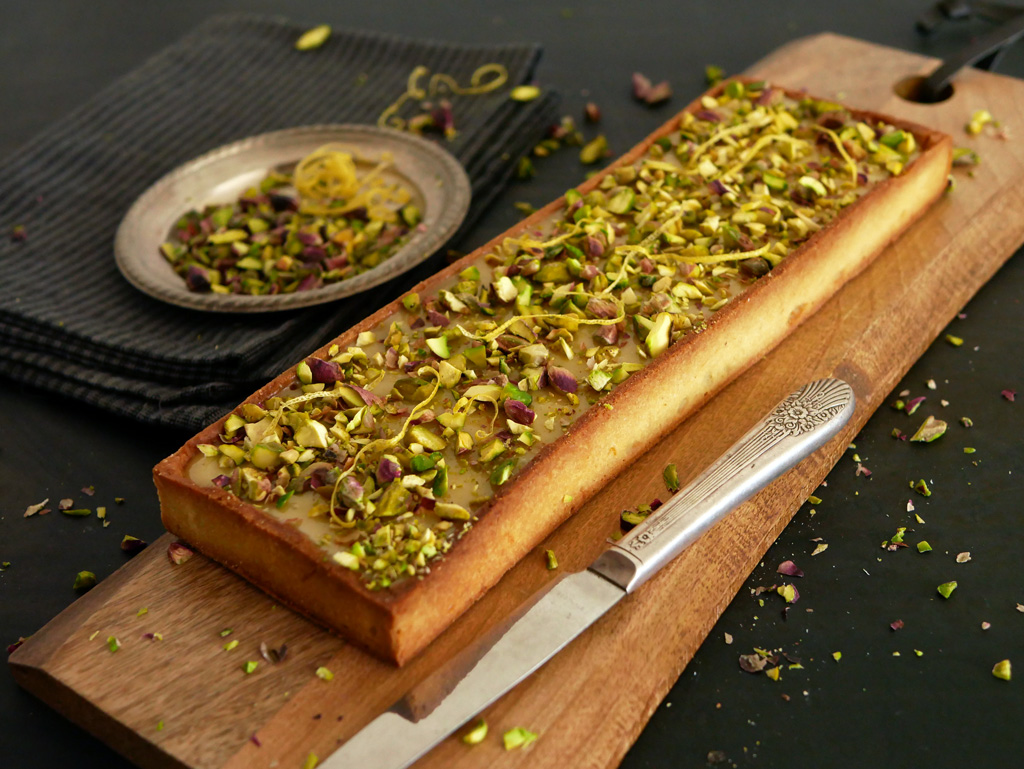
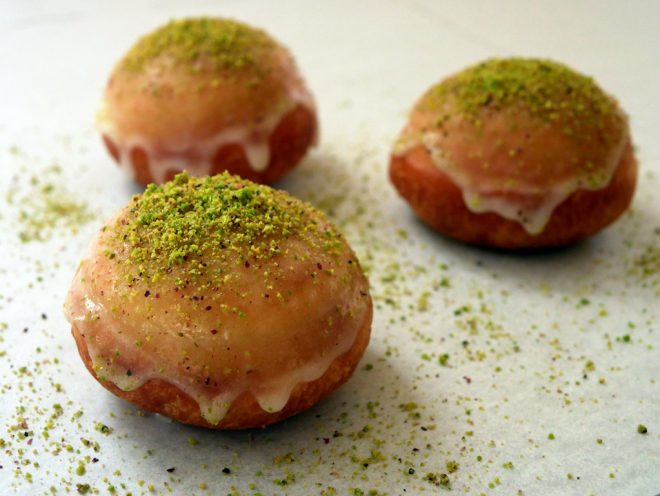
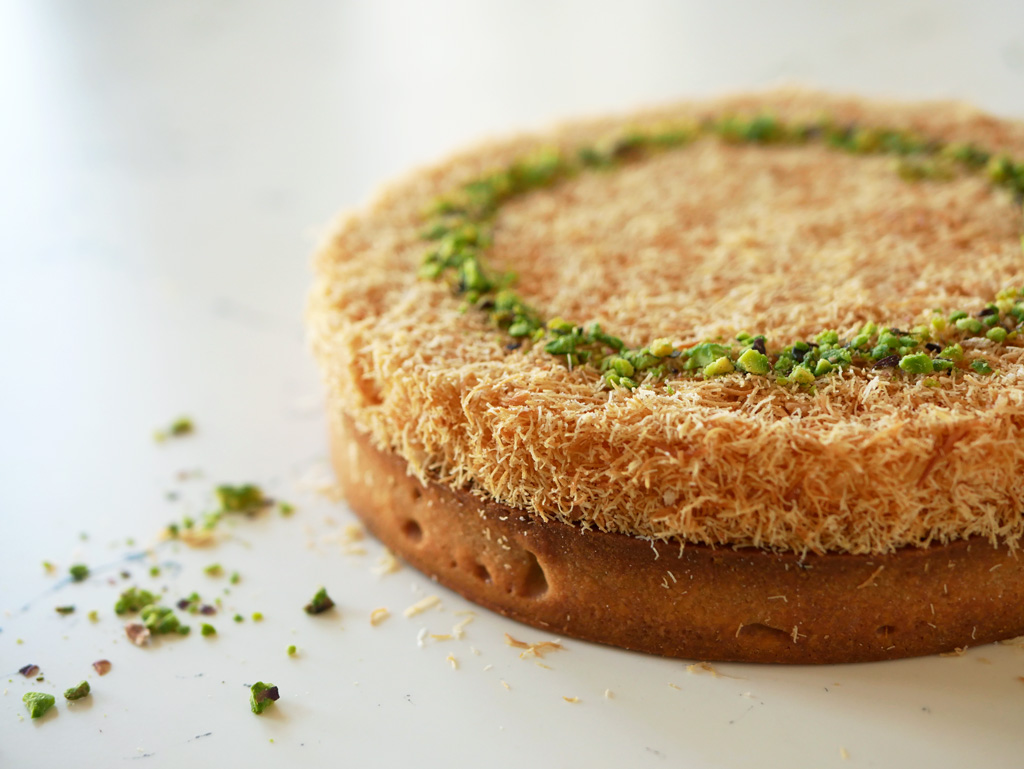
Lemon Halva Tart
Not long ago I got a gift – a Lebanese baking book full of interesting recipes and cool ideas. One of the recipes that popped out at me was a classic lemon tart with a twist. What twist? Halva! How does it work? It works perfectly!
The flavor starts lemony and ends up with a surprising halva flavored bite. I didn’t enjoy this tart (and this wonderful basbousa) all by myself. Natalie from the wonderful Lil’ Cookie blog helped prepare and taste this tart. We both agreed, lemon and halva is a match made in heaven.
The recipe here is a little lot different from
the original one. The cream in this recipe is more subtle and smoother. The
original crust contains pine nuts, which is a brilliant idea.
Unfortunately, the amount of pine nuts was so big that it made the dough too gooey to work with (not to mention how expensive it was). So we replaced it with a more stable crust with no pine nuts, but with lemon zest instead.
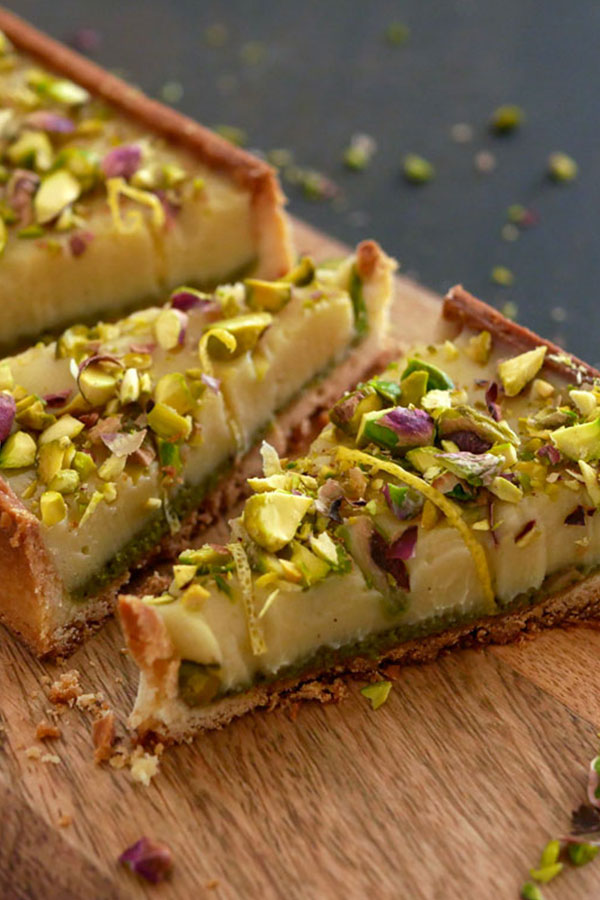
Finally, we took it a step further and added another layer, full of pistachios. I believe pistachios work nicely with lemon, and even more with halva. You may skip that extra layer if you’d like to shorten the process or want to taste the combination of lemon and halva more.


Ingredients
Crust
175 g flour
20 g almond powder
65 g powdered sugar
2 g salt (½ tsp)
Zest from 1 lemon
100 g cold butter (cut into cubes)
45 g eggs
Pistachio paste
150 g shelled pistachios
25 g grape seed oil (or vegetable oil)
Lemon halva cream
110 g lemon juice
150 g sugar
Zest from 1 lemon
2 large eggs (120 g)
100 g soft butter (at room temperature)
150 g halva
Decoration
Lemon zest
Chopped pistachios
Equipment
Rectangular ring, 30×10 cm big and 2.5 cm high
Hand blender
Measuring pitcher
Crust
Put flour, almond powder, powdered sugar, salt, lemon zest and butter cubes in the mixer bowl and keep in the fridge for about 10 minutes. Remove from fridge.
Using the paddle attachment, start mixing at low-medium speed until the batter reaches sand-like consistency. Make sure the butter chunks are as small as possible at the end of the process without melting the butter.
Add the eggs all at once and keep mixing at medium speed until the dough starts to form but is not yet completely uniform. Remove dough parts from the bowl and combine.
Cover dough with plastic wrap. Roll out the dough a little bit. Keep in the fridge for at least an hour. (It’s always better to prepare the dough in advance, the dough keeps for up to a week in the fridge and for about two-three months in the freezer.)
When the dough is stiff and cold, remove the plastic wrap. In a cool room, flour the work surface, place the dough on top and dust it with flour as well. Roll out the dough with a rolling pin. Keep turning the dough throughout and make sure it doesn’t stick to the surface. Roll out the dough to a 3-4 mm thickness.
Please note (!) If at any point the dough starts to soften, put it back in the fridge until it is stiff again.
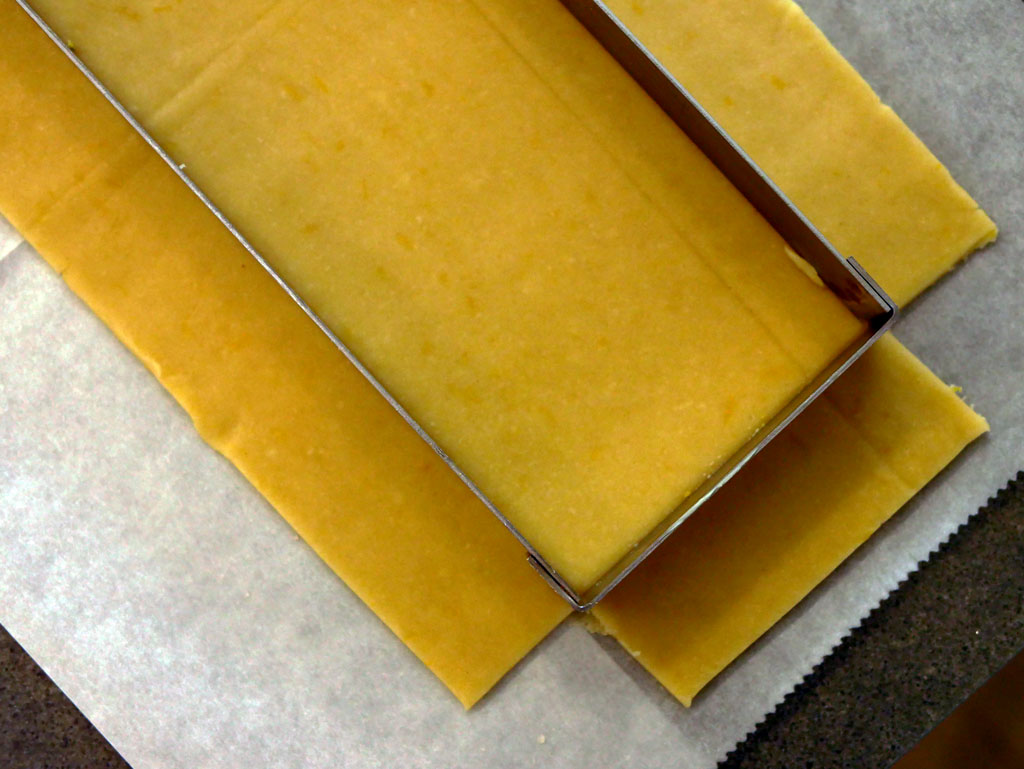
Fonçage:
Lightly butter the inner side of the baking ring so that the dough sticks to it. Place the ring gently on top of the dough and cut a larger rectangle around the ring. Cut the corners of the dough as seen in the picture above. Place the ring on a parchment paper and place the dough gently on top of it.
Lift the edges of the dough, gently push the rest of the dough down and attach the edges to the sides of the ring, starting from the bottom of the ring to the top. Gently press down on the sides so that the corners at the bottom form a right angle. (It’s not the end of the world if the dough gets torn accidentally. Just attach the sides that have been torn apart and move on). Go over the top of the ring with a sharp knife and remove the excess dough.
Blind baking:
Prick the bottom of the crust all over with a fork and keep in the freezer until the dough is stiff again (about half an hour). Preheat the oven to 160 ºC (320 ºF). When the desired temperature is reached, remove the crust from the freezer and set it on a baking sheet lined with parchment paper. Line the crust with parchment paper. Fill the crust with pie weights or dry chickpeas (don’t forget the corners).
Place the sheet in the oven and bake for 17 minutes. Remove the baking sheet from the oven and gently remove the parchment paper containing the pie weights (be careful not to break the crust in the process). Put the crust back in the oven and bake for another 10-12 minutes until the crust begins to brown. Set aside to cool.
Brush the top of the crust against a flat mesh sieve to straighten the edges and give it a cleaner, sharper look.
Pistachio paste
Preheat the oven to 160 °C (320 ºF). Scatter the pistachios on a baking tray and roast for about 7 minutes until they brown a bit.After the pistachios have cooled, grind them to a powder in a small food processor. Add the oil and grind again until it becomes a paste.
Use half the amount of the pistachio paste and spread a thin layer of it at the bottom of the tart. Flatten the surface with a spoon. Keep the rest of the pistachio paste in a sealed container in the fridge.
Lemon halva cream
Crumble halva and put it in a measuring pitcher. Keep aside.
Add lemon juice, sugar, lemon zest and eggs in a saucepan and whisk. Start warming on medium heat, while whisking all along to prevent the egg yolk from congealing. Once the mixture starts to thicken, remove from heat and pour the mixture through a sieve into the measuring pitcher. Mix well.
Add the soft butter (gradually but quickly) and mix well. Grind with a hand blender to a uniform consistency. Pour the cream immediately into the crust and fill it up. Keep in the fridge for about an hour \to let the cream set.
Decoration
Remove the tart from the fridge. Decorate the top with lemon zest and chopped pistachios. Keep the lemon halva tart in the fridge in an airtight container up to 2 days.


Hello, what is the type of flour you used for the pastry please?
Hi Stephanie,
I used regular all-purpose white flour.
thank you am preparing it for NYD. wanted to ask also re the remainder of the pistacchio paste. What do you do or is that extra?
Oh cool, happy new years!
I would keep the remainder of the pistachio paste in the fridge up to a week (or maybe even two) and use it in a different recipe.
Thank you! It was a succesful dessert. Everyone loved it! Happy new year to you too!
Oh yay!
I’m so glad to hear that 🙂
what is halva
It’s Halaweh.
Your recipe does not contain a reference to the size of the oblong baking ring.
Hey Lisa!
You can find it at the bottom of the ingredients list.
It’s 30×10 cm (2.5cm high)
This looks so great! Question: am I misreading the directions? What do you do with the halvah? Thanks.
Thanks Alysa!
Yeah, I think you missed a line, right under how to make the lemon halva cream. You’re supposed to crumble the halva and put it beforehand in the measuring pitcher and later on the rest of the ingredients.