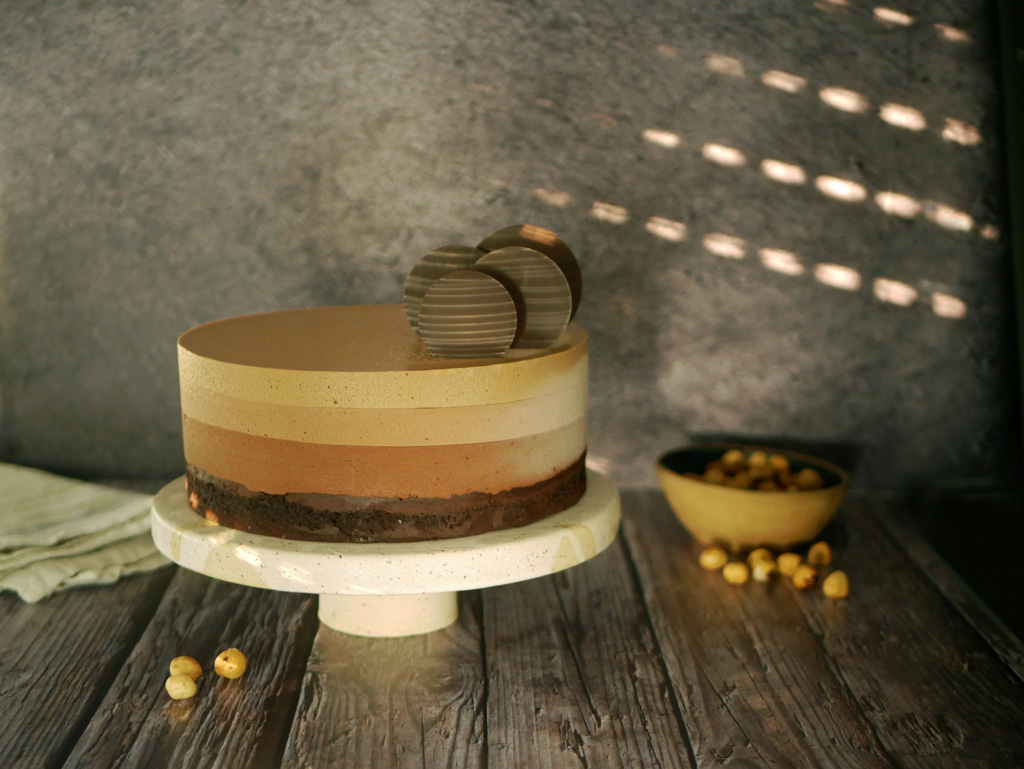
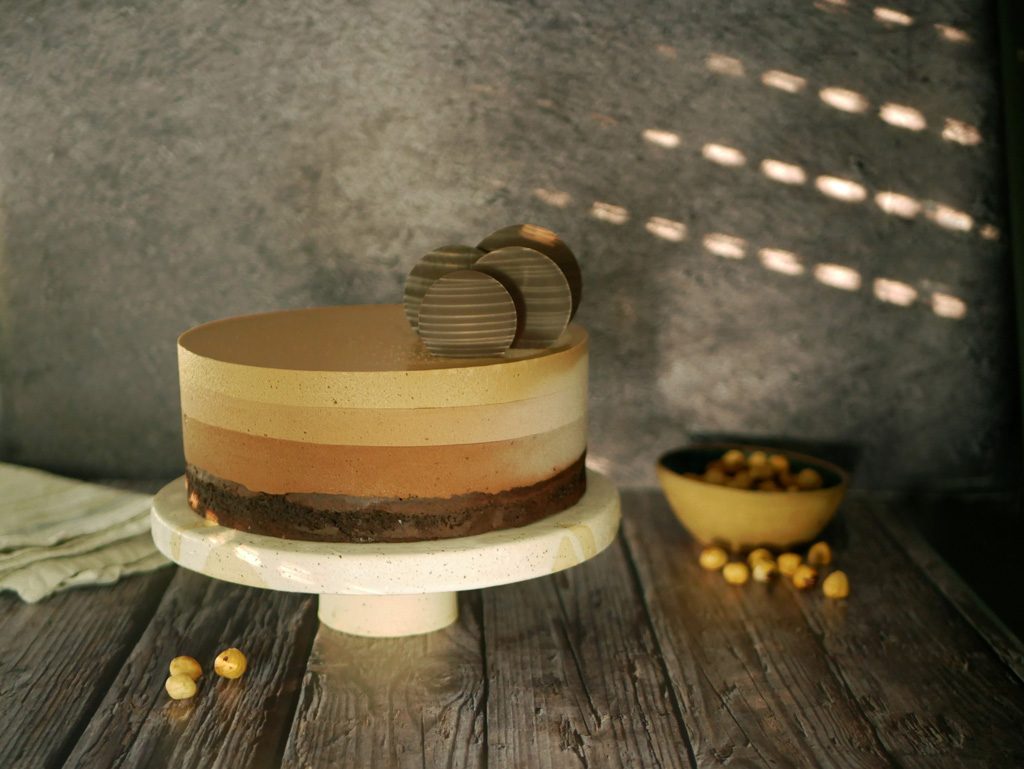
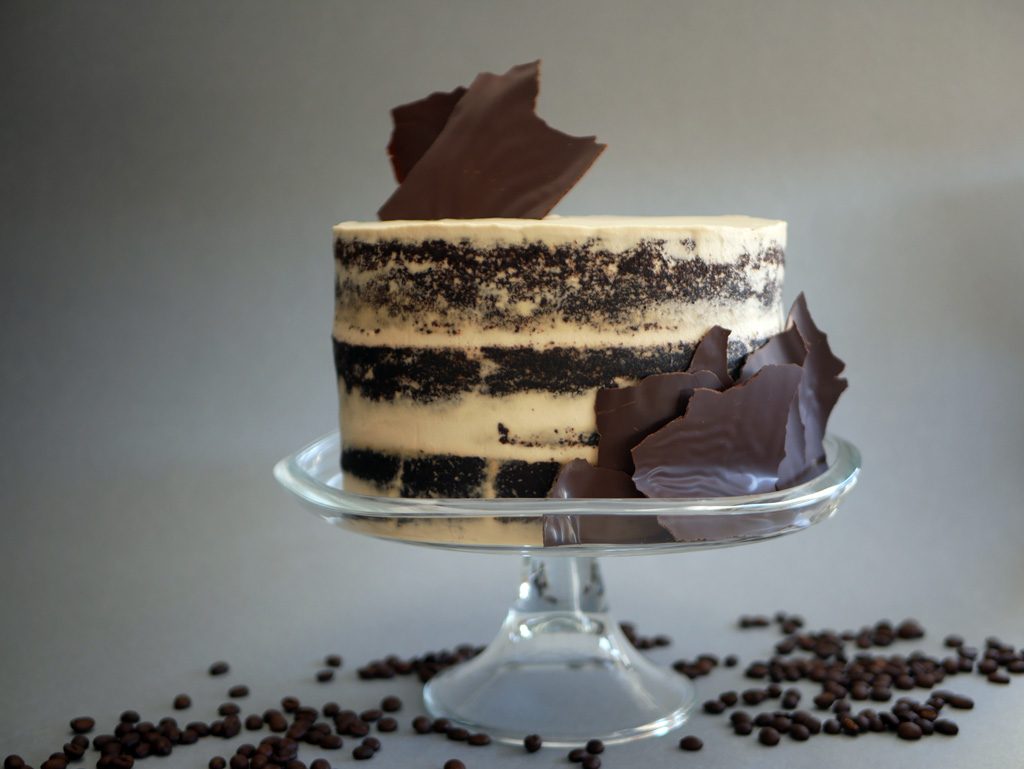
Coffee Gianduja Chocolate Mousse Cake v2.0
Last year, I made a coffee gianduja chocolate mousse cake for Sumaya’s birthday (and not Somalia, as customers sometimes call her.. innocently of course). Sumaya is a colleague of mine. We work at the pharmacy and terrorize our customers together. Well, only those who are impatient enough to cross the red line marked on the floor they’re supposed to wait behind (or the line we can put up with). For them the red line is probably an imaginary one.. Part of the décor in the pharmacy. But I guess that’s how things work in this part of the world.
At least we have good mousse cakes we can take comfort in. Like this one. The cake is actually an improved version of Sumaya’s birthday cake. The coffee wasn’t strong enough in that cake. Last time, I added dark chocolate which took over the coffee taste. Karin, a blog reader, suggested I replace the dark chocolate with white chocolate and promised it would turn out excellently. I tried her suggestion and it worked out wonderfully!
The coffee was so much more pronounced in white chocolate that it was such a delight. Yet, I didn’t want to give up on the dark chocolate. So I decided to separate the two layers to emphasis both flavors. In addition, both layers are separated by a third layer of hazelnut flavored chocolate mousse. And that’s not all!
…
I had to go through some trial and error before I found the perfect mousse base. The previous one would become too hard to cut after being frozen, which is another issue that Karin noticed (what would I do without you, Karin?). I’ve tried five different bases before I got to this one. It’s basically espresso brownies. I found the recipe in the book “Brownies, blondies and other traybakes”, which inspired me to make these wonderful chocolate-banana brownies. The espresso brownies were so delicious that they managed to steal the show from all of the other layers! It did get most of the compliments. How ironic.
I have to mention one thing before you begin. The mousse preparation requires 2 double boiler sets (2 saucepans + 2 stainless steel bowls). I prepared the mousse using a different method this time. It’s done by warming the eggs to a high enough temperature that the eggs get pasteurized in the process. Now pregnant women (and mom also!) can enjoy this cake too.


Ingredients
Espresso brownies
160 g dark chocolate
80 g soft butter
210 g sugar
4 medium eggs (200 g)
3 tbsp strong espresso coffee
50 g flour
50 g cocoa powder
Gelatin mass
13 g gelatin powder
65 g water
Dark chocolate mousse
60 g egg yolk
25 g eggs
45 g sugar
30 g water
20 g gelatin mass
240 g dark chocolate
200 g heavy cream
Gianduja chocolate mousse
60 g egg yolk
25 g eggs
45 g sugar
30 g water
25 g gelatin mass
220 g gianduja chocolate
20 g dark chocolate 70%
3 g cocoa butter (1 tsp)
200 g heavy cream
Coffee chocolate mousse
60 g egg yolk
25 g eggs
45 g sugar
30 g water
25 g gelatin mass
220 g white chocolate
20 g dark chocolate 70%
3 g cocoa butter (1 tsp)
200 g heavy cream
2 tbsp instant coffee in granules
Decoration (optional)
200 g dark chocolate
Equipment
A round ring, 22 cm diameter and 6-8 cm height
Acetate strip, 10 cm height
2 double boilers
Acetate sheet (for the decoration)
Round cookie cutters (for the decoration)
Thermometer
Advance prep
Gelatin mass: Sprinkle gelatin powder over the water, mix well and keep in the fridge for at least half an hour. Cut into small pieces before use.
Cream infusion (for the coffee chocolate mousse): The goal here is to make the heavy cream taste like coffee before whipping it. This can be done in two ways:
- Cold infusion: Pour heavy cream into a bowl. Add coffee granules and mix a little. Cover with plastic wrap and keep in the fridge for a night (about 12 hours). Mix well before use.
- Hot infusion: Put a quarter of the heavy cream in a kettle and add the coffee granules. Start warming on medium heat, while mixing all along, only until the coffee melts. Transfer to a bowl and add the rest of the cream. Mix well. Keep in the fridge for at least two hours so that the cream is cold enough before whisking.
Espresso brownies
Place a layer of aluminum foil on a baking tray, followed by a layer of parchment paper and set the ring on top. Fold the edges of the paper and foil to the sides of the ring and tighten them so that the batter won’t spill out of the bottom of the ring. Lightly grease the inner wall of the ring and line it with parchment paper. Set aside.
Make an espresso and set aside. Melt the chocolate on a double-boiler, while mixing all along, until the mixture is smooth and uniform. Remove from heat and set aside until use. Preheat the oven to 180 ° C (350 °F).
If the butter is not soft enough, heat it in the microwave in 5-second pulses until you get a mayonnaise texture. Add the butter to the mixer bowl and add sugar. Whip on medium-high speed until the mixture is pale and thick (about 5 minutes).
Add the eggs gradually to the butter mixture. Mix on high speed after each addition. Make sure to scrape the bottom of the bowl each time before adding more eggs.
* If the mixture separates after adding all the eggs (due to oil and water separation), set the mixer bowl on a double-boiler on low heat and start whisking. This will fix everything.
Add three tablespoons from the espresso to the mixture and mix. Sift flour and cocoa powder directly into the mixer bowl and fold together, gently, using a whisk. Add the melted chocolate and mix until uniform.
Bake
Pour the batter into the ring and flatten the surface with a spreading spatula. Place the tray in the oven and bake for about 25 minutes. Stick a toothpick in the center of the cake/brownies to check if it’s ready. The toothpick should come out almost dry. Let the cake cool at room temperature.
Release the ring and remove the parchment paper. Cut the head of the cake with a large serrated knife or a cake saw. To get a straight clean cut, keep turning the cake and cut first from the sides then slowly advance to the center of the cake.
Place the cake on a serving plate. Wash the ring, dry it and place it around the cake, with an acetate sheet in between.
Dark chocolate mousse
Whip the heavy cream until you almost get soft peaks (beware not to over whip, the goal is to get a texture that resembles yogurt). Keep in the fridge.
Melt dark chocolate on a double-boiler. Once the chocolate has melted, turn off the flame and leave the bowl on the double-boiler to keep the mixture warm.
Put egg yolk, eggs, sugar and water in a stainless steel bowl and whisk until uniform. Place the bowl on a second double-boiler and heat gently (low-medium fire) to 80-82 ° C (176-180 ° F), while mixing all along. Once the desired temperature is reached, strain the mixture immediately into the mixer bowl and whip on high speed for about 5 minutes, until the egg mixture cools. When you drop a spoonful of the mixture into the bowl it should fall back in ribbons and disappear into the mixture slowly.
In the meantime, melt the gelatin mass on a double-boiler and remove the melted chocolate from the hot steam. Make sure the chocolate temperature is between 45-50 ° C (113-122 ° F). If the temperature is too high, I recommend transferring the chocolate into another bowl to cool it faster.
Add the melted gelatin mass to the egg mixture and mix a little. Add the warm chocolate and mix until uniform. The texture will become viscous. Remove the heavy cream from the fridge and whip it a little more (remember, yogurt texture).
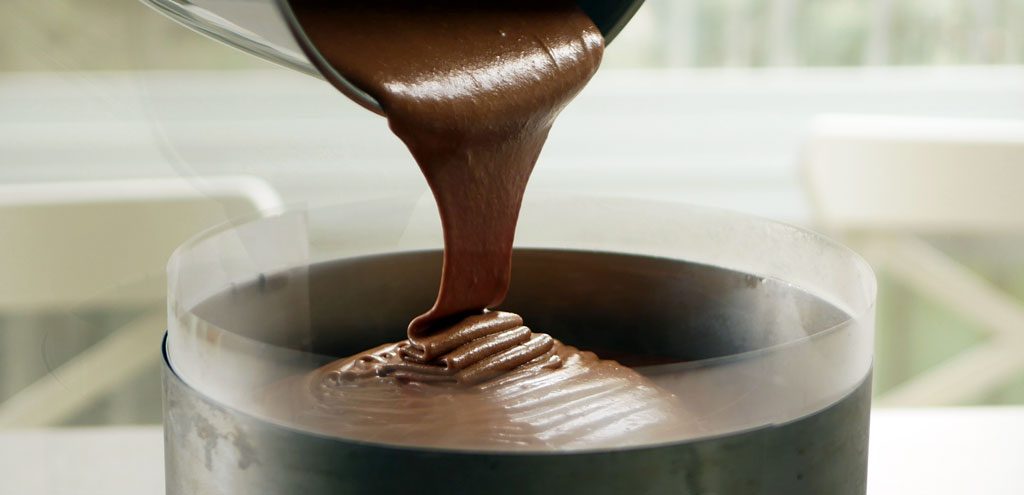
Fold the heavy cream into the egg mixture in three parts. Pour immediately into the ring over the brownies. Give it a little shake to flatten the mousse and keep it in the freezer for about an hour or two.
Gianduja chocolate mousse
Whip the heavy cream until you almost get soft peaks (beware not to over whip, the goal is to get a texture that resembles yogurt). Keep in the fridge.
Melt gianduja chocolate, dark chocolate and cocoa butter on a double-boiler. Once the chocolate has melted, turn off the flame and leave the bowl on the double-boiler to keep the mixture warm.
Put egg yolk, eggs, sugar and water in a stainless steel bowl and whisk until uniform. Place the bowl on a second double-boiler and heat gently (low-medium fire) to 80-82 ° C (176-180 ° F), while mixing all along. Once the desired temperature is reached, strain the mixture immediately into the mixer bowl and whip on high speed for about 5 minutes, until the egg mixture cools. When you drop a spoonful of the mixture into the bowl it should fall back in ribbons and disappear into the mixture slowly.
In the meantime, melt the gelatin mass on a double-boiler and remove the melted chocolate from the hot steam. Make sure the chocolate temperature is between 45-50 ° C (113-122 ° F). Transfer the chocolate into another bowl to cool it faster.
Add the melted gelatin mass to the egg mixture and mix a little. Add the warm chocolate and mix until uniform. The texture will become viscous. Remove the heavy cream from the fridge and whip it a little more (remember, yogurt texture).
Fold the heavy cream into the egg mixture in three parts. Pour immediately into the ring over the brownies. Give it a little shake to flatten the mousse and keep it in the freezer for about an hour or two.
Coffee chocolate mousse
Remove the coffee infused heavy cream from the fridge and whip until you almost get soft peaks (beware not to over whip, the goal is to get a texture that resembles yogurt). Keep in the fridge.
Melt white chocolate, dark chocolate and cocoa butter on a double-boiler. Once the chocolate has melted, turn off the flame and leave the bowl on the double-boiler to keep the mixture warm.
Put egg yolk, eggs, sugar and water in a stainless steel bowl and whisk until uniform. Place the bowl on a second double-boiler and heat gently (low-medium fire) to 80-82 ° C (176-180 ° F), while mixing all along. Once the desired temperature is reached, strain the mixture immediately into the mixer bowl and whip on high speed for about 5 minutes, until the egg mixture cools. When you drop a spoonful of the mixture into the bowl it should fall back in ribbons and disappear into the mixture slowly.
In the meantime, melt the gelatin mass on a double-boiler and remove the melted chocolate from the hot steam. Make sure the chocolate temperature is between 45-50 ° C (113-122 ° F). Transfer the chocolate into another bowl to cool it faster.
Add the melted gelatin mass to the egg mixture and mix a little. Add the warm chocolate and mix until uniform. The texture will become viscous. Remove the heavy cream from the fridge and whip it a little more (remember, yogurt texture).
Fold the heavy cream into the egg mixture in three parts. Pour immediately into the ring over the brownies. Give it a little shake to flatten the mousse and keep it in the freezer for at least two hours (and even more – It’s easier to remove the acetate strip without affecting the form of the cake when it’s frozen solid).
Decoration (optional)
Dampen a flat surface with a wet rag. Place an acetate sheet on the damp surface (the moisture will allow the sheet to stick to the surface). Go over the sheet with a dry paper towel to remove air bubbles and flatten it.
Temper chocolate. Once the chocolate is tempered, pour it to the center of the acetate sheet. Using a large spreading spatula, flatten the chocolate over the sheet up a little, down a little and then to the sides to get a thin and uniform layer. Avoid going over the chocolate with the spatula more than once or twice. Let the chocolate set for about a minute or two until it’s dry to the touch. Cut circles in different sizes using the round cookie cutters.
Putting it all together!
After the mousse has set in the freezer, release the ring and peel off the acetate strip. Decorate the top of the cake with the chocolate decorations (or any other decoration your heart desires). Keep in the fridge. Before serving the cake, boil water and fill a tall glass with it. In order to get a clean cut, dip the knife in the hot water, wipe the knife dry and only then cut the cake.


10 Comments
Leave a reply:
![]()
Get updates by email
![]()


do you think it would be okay to use any other chocolate in replacement of gianduja?
Yeah, it would be OK. I would replace it with milk chocolate.
Is there a conversion app that can be added to this recipe post? I’m from the United States.
Hey,
I’m so sorry. There’s no conversation app. Apologies.
Hey! I really like the brownie in your recipe and I want to make a cake with it but I feel like it’s kinda heavy and I’m not sure if it’s appropriate for stacking… would you recomend some kind of “cream” that will be enough stable to without the weight? I wanted to make a mascarpone with cream cheese and powdered sugar to balance the sweetness of the brownie but I feel like it’s not stable enough. I’ll try to make it though but wanted to hear your opinion 🙂
Hey Mira!
Mmmm, I’m not sure how it’ll work as a stacked cake, but it does have the potential for it. The cream sounds wonderful, but it should be pretty stable to hold the brownies. A ganache or buttercream might work better, but then again, they would add more sweetness I guess. Unless it’s a dark chocolate ganache.
Which recipe do you recommend better, this one or the first one you made?
Definitely this one 🙂
Hello, I want to make this cake for my brother-in-law’s birthday this week. Just wondering, can I replace the cocoa butter by butter? I don’t have any and don’t know where to buy it. Is the flour in the brownie self-rising or is their simply no leavener? Finally, I am worried about the height of the cake as my 22cm cake tin is not super tall, maybe 8cm, and I don’t have the plastic ring like you’ve used.. would parchement paper suffice? If not I have a 25cm tin I could use. Do you think this cake would be pretty if it were more short and squat with this larger cake tin? Thank you!
Hi Sarah!
Sorry, you can’t replace cocoa butter with butter. However, it’s possible to omit it and add a little bit more dark chocolate. The cocoa butter from the dark chocolate will make the mouse more stable.
The flour in the brownie is regular all purpose flour, not self rising. Sorry for not being clear about that.
It won’t work with parchment paper. It will probably just leak from it. I think the cake was about 8cm tall and I used a 10cm acetate strip just to be on the safe side. If it was me, I would still use the 22cm pan and just stop pouring the mousse when I’m close to the edge. I find taller cakes to be prettier 😉