
Apple Tart for Daniella


A while ago, Daniella, a dear friend and former neighbor, sent me an image of a fancy apple tart. Below the image she wrote: “Please make this for me”. Daniella now lives in Washington D.C., so of course she was just joking. I took it a little more seriously.
Two months later, I came to visit the capital, regardless of her modest request. As it happens, Daniella celebrated her birthday a week prior and somehow that tart popped into my mind. I decided to surprise her and make an apple tart per her request. A beautiful tart by Cédric Grolet.
As soon as we landed in Washington, Daniella greeted us with snacks and apples. Not just any apples. They were called Gold Rush apples. They taste like Golden Delicious apples but a little bit more sour. You can only find them in a farmer’s market that changes its location every other day. That made it hard for me to find it without raising suspicion.
For this tart, I kept two of the Gold Rush apples that Daniella gave us and added some Granny Smith to them. In addition, I used red apples to decorate the tart. You may use any red apples you like. Myself, I used Royal Gala.
…
True, it’s not easy to bake in a strange kitchen, especially abroad. Fortunately, my friends Sharon and Yonathan were kind enough to lend me their kitchen for a day and they didn’t even complain about the mess. Not only that, they even made my task easier. Yonathan cleaned up most of the mess, and even made me a cup of coffee “à la Yonathan” with my first initial in the foam.
Not long ago, the French pastry chef Cédric Grolet presented to the world his take on the apple tart. Ever since, social media blossomed with images of this rose-like tart. Unfortunately, I wasn’t able to find the chef’s recipe. I even bought his fruity cookbook, but the desired recipe wasn’t there. Eventually I created my own version of the recipe with the help of this blog, this blog and this video.
This is not your usual apple tart. The flavor is a little surprising. The tart is full of various apples, some sweet and some sour, some cooked and some not. The crust is filled with almond cream and apple compote on top that could serve as a classic apple tart by itself.
What wows the crowd is the apple crown on top. These apple slices are not cooked, just slightly baked, so it could be a little confusing to an innocent taster. But I guess this was the poet’s intention. In any case, this apple tart was all gone by the end of the night and everyone enjoyed it. A lot.


Ingredients
Crust
175 g flour
20 g almond powder
65 g powdered sugar
½ tsp salt (2g)
100 g cold butter (cut into cubes)
1 tsp vanilla paste
40 g eggs
Almond cream
50 g soft butter (at room temperature)
50 g powdered sugar
40 g eggs (at room temperature)
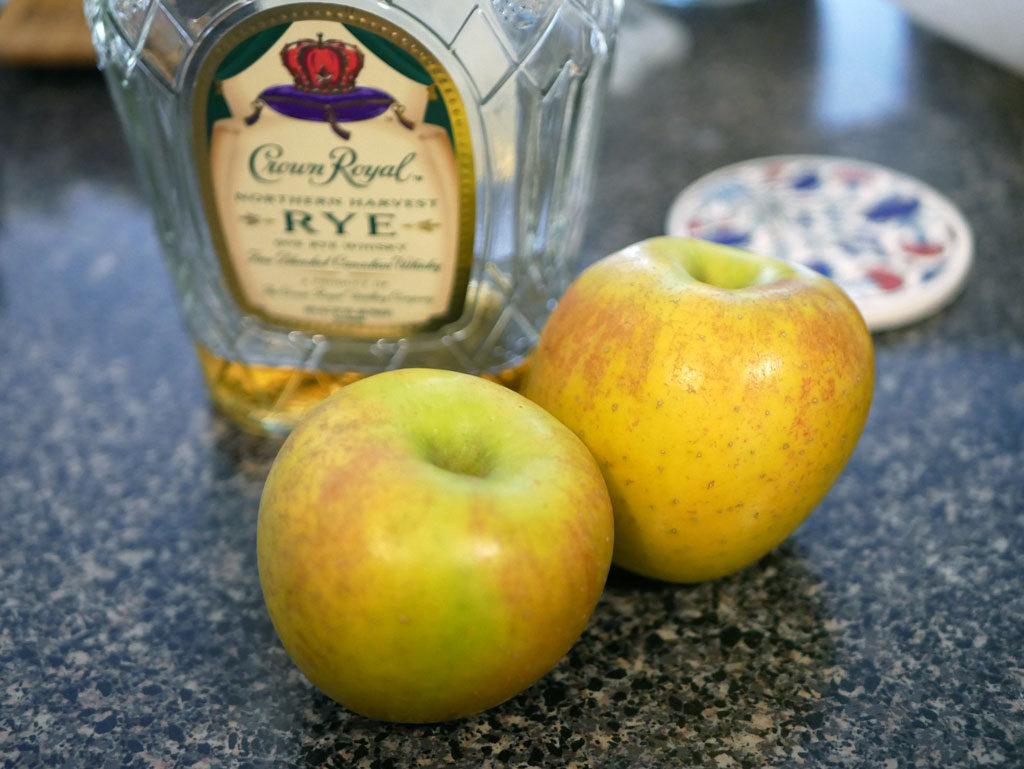
2 tsp whisky (or any other liquor)
50 g almond powder
10 g corn starch
Half a Granny Smith apple
Apple compote
About 4 Granny Smith apples (500 g)
Juice from 1 lemon (60 g)
Lemon syrup
250 g water
200 g sugar
Juice from 3 lemons
Decoration
5-6 red apples (Royal Gala)
50 g butter
Equipment
Round ring, 20 cm diameter and 2.5 cm height
Pastry bag fitted with a smooth 10 mm tip
Small spreading spatula
Peeler
Mandoline slicer
Brush
Crust
Put flour, almond powder, powdered sugar, salt and butter cubes in the mixer bowl and keep in the fridge for about 10 minutes. Remove from fridge. Using the paddle attachment, start mixing at low-medium speed until the batter reaches sand-like consistency. Make sure the butter chunks are as small as possible at the end of the process without melting the butter.
Add vanilla and eggs all at once and keep mixing at medium speed until the dough starts to form but is not yet completely uniform. Remove dough parts from the bowl and combine. Cover dough with plastic wrap. Roll out the dough a little bit. Keep in the fridge for at least an hour. (It’s always better to prepare the dough in advance, the dough keeps for up to a week in the fridge and for about two-three months in the freezer.)
When the dough is stiff and cold, remove the plastic wrap. In a cool room, flour the work surface, place the dough on top and dust it with flour as well. Roll out the dough with a rolling pin. Keep turning the dough throughout and make sure it doesn’t stick to the surface. Roll out the dough to a 3-4 mm thickness.
Please note (!) If at any point the dough starts to soften, put it back in the fridge until it is stiff again.
Fonçage:
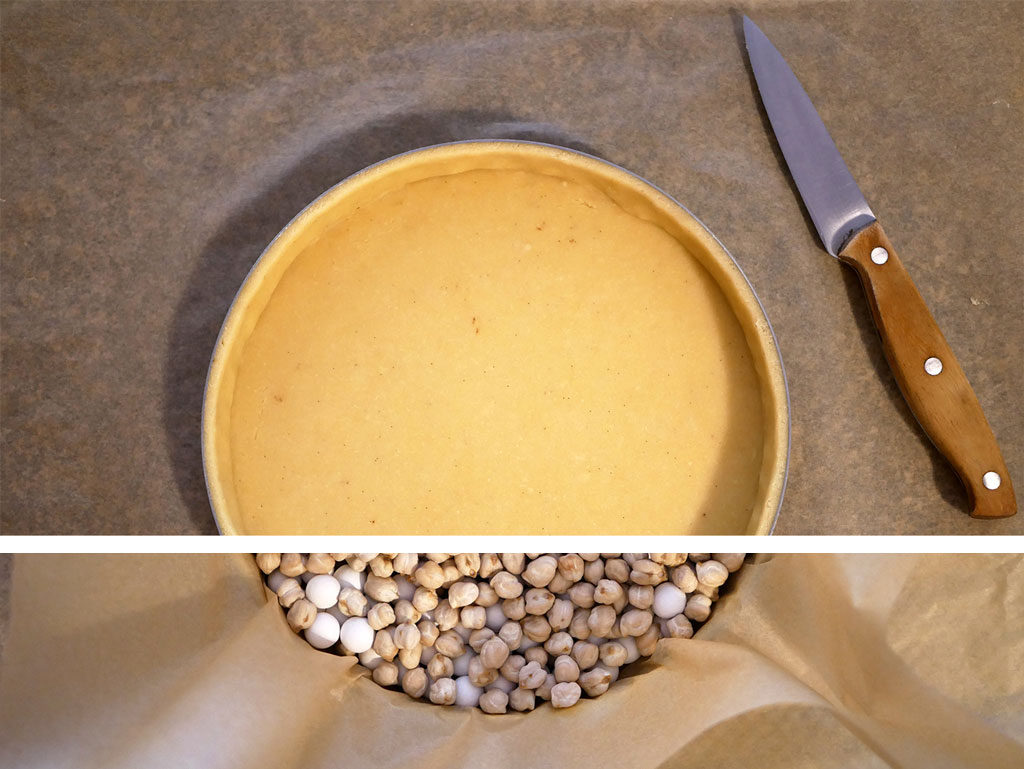
Lightly butter the inner side of the baking ring so that the dough sticks to it. Place the ring gently on top of the dough and cut a larger circle around the ring. Place the ring on a parchment paper and place the dough gently on top of it. Lift the edges of the dough, gently push the rest of the dough down and attach the edges to the sides of the ring, starting from the bottom of the ring to the top.
Gently press down on the sides so that the corners at the bottom form a right angle. (It’s not the end of the world if the dough gets torn accidentally. Just attach the sides that have been torn apart and move on). Go over the top of the ring with a sharp knife and remove the excess dough.
Blind baking:
Prick the bottom of the crust all over with a fork and put back in the freezer until the dough is stiff again (about half an hour). Line the crust with parchment paper. Fill the crust with pie weights or dry chickpeas. Keep in the freezer. Preheat the oven to 160 ºC /320 ºF. When the desired temperature is reached, remove the crust from the freezer and set it on a baking sheet lined with parchment paper.
Place the sheet in the oven and bake for 17 minutes. Remove the baking sheet from the oven and gently remove the parchment paper containing the pie weights (be careful not to break the crust in the process). Put the crust back in the oven and bake for another 10-12 minutes until the crust begins to brown. Set aside to cool.
Brush the top of the crust against a flat mesh sieve to straighten the edges and give it a cleaner, sharper look.
Almond cream
If the butter is not soft enough, heat it in the microwave in 5-second pulses until it softens. Put the butter in the mixer bowl. Add powdered sugar and mix using the paddle attachment (on low speed at first, then high). Preheat the oven to 170 ºC /340 ºF.
Beat the eggs slightly with a fork, then add gradually to the mixer. Wait each time until the eggs combine with the batter completely before adding more. Scrape the sides occasionally. Add whiskey to the mixer gradually as well. Add almond powder and mix. Finally, add corn starch and mix until uniform.
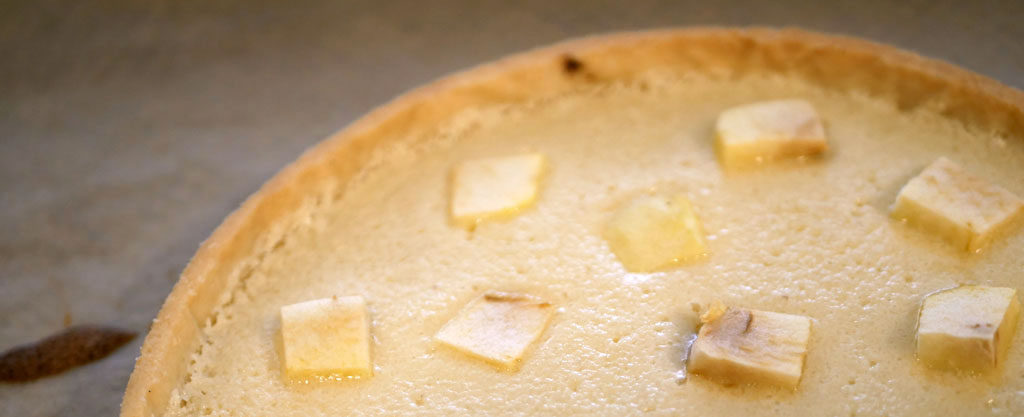
Fit a pastry bag with a smooth 10 mm tip and fill it with the almond cream. Pipe the almond cream inside the crust in a spiral form, from the center out. Flatten the surface with an offset spatula.
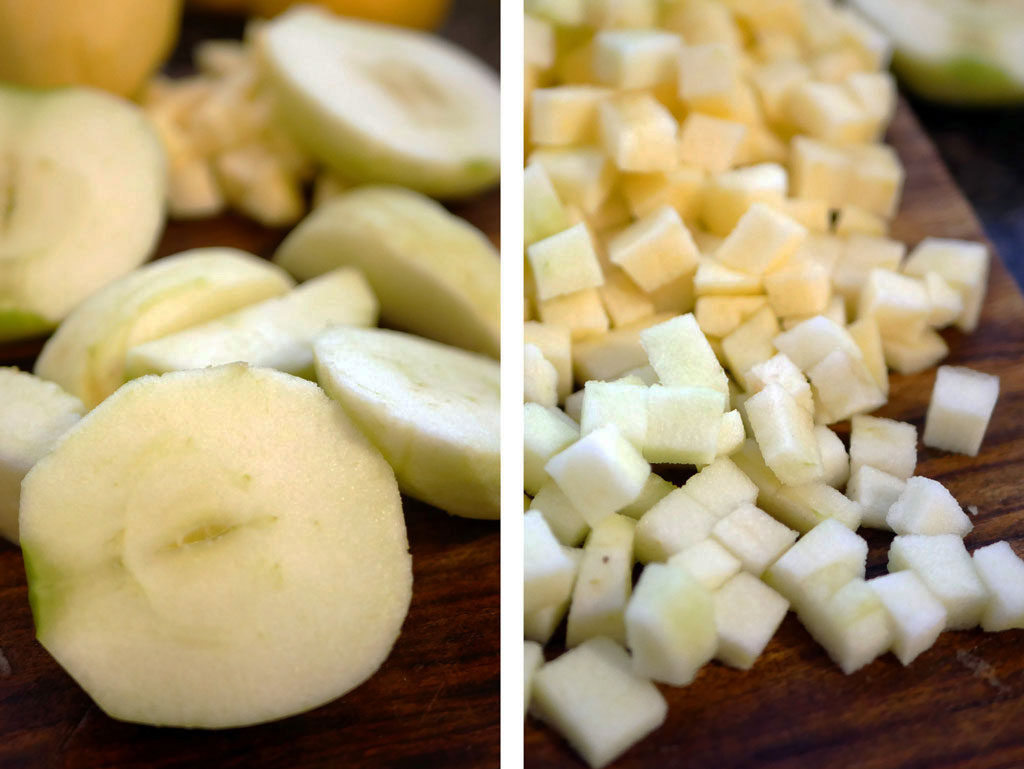
Use the peeler to peel the apple. Cut the apple into small cubes, about 1 cm wide. Get rid of the apple core. Spread the apple cubes on top of the almond cream.
Place the tart in the oven. Bake for about 10-12 minutes until the cream is stable to the touch (Sharon and Yonathan’s oven wasn’t strong enough, so I kept baking for 4 minutes more). Remove from oven and let cool at room temperature.
Apple compote
Use the peeler to peel the apples. Cut the apples into small cubes, about 1 cm wide. Get rid of the apple core. Weigh 500 g apple cubes. It’s important to work quickly at this point to avoid the apples from browning.
Place the apple cubes in a cooking pot. Add lemon juice. Cover the pot and cook on low-medium heat for about 25 minutes, while stirring all along, until the apples soften. Stop cooking when you get a compote that still contains some whole apple cubes (be careful not to overcook).
Transfer the apple compote to a wide bowl. Let it cool in the fridge for about half hour. Prepare the lemon syrup in the meantime.
Lemon syrup
Pour water and lemon juice into a saucepan. Add sugar. Place on medium heat. Stir the sugar with a spatula to dissolve it. Once it starts to boil, stop stirring and remove from heat. Transfer the syrup into a bowl to let it cool faster.
Putting it all together!
Remove the apple compote from the fridge. Spread the compote on top of the tart and create a sort of mound, just like in the picture above. Keep aside.
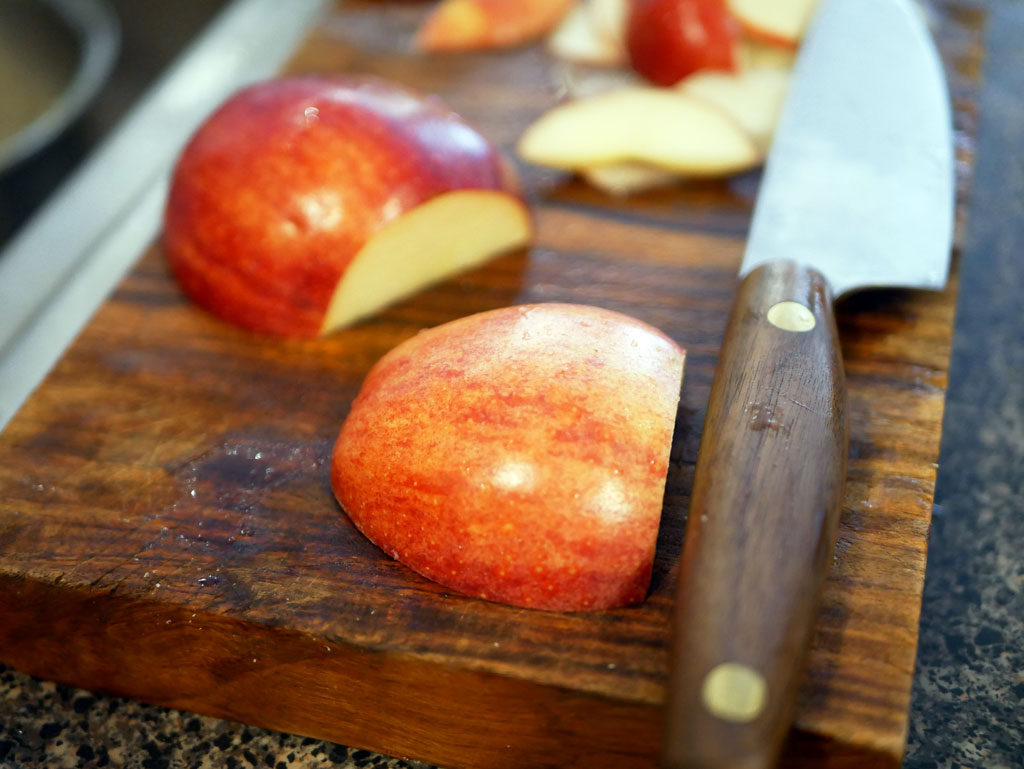
Use the peeler to peel the apples. Cut each apple in half, around the core. Cut the head of the apples. You can see a great example of this in the maestro’s video.
Adjust the mandoline to 2-3 mm thickness. Place the mandoline on top of the lemon syrup bowl. Very carefully, cut the apples into thin arched slices using the mandoline. Let the slices of each apple fall directly from the mandoline to the syrup and let them soak for about 10 seconds in the syrup. Remove from the syrup and lay them on a paper towel.
…
For the next step, I warmly advise to watch the demonstration here or in the maestro’s video. Dry the apple slices a bit using a paper towel. Arrange the apple slices around the tart in a spiral form. After laying an apple slice on the tart, fasten its bottom to the compote. Keep doing this until you almost reach the center of the tart.
Take six apple slices and spread them lengthwise on a surface, with each slice overlapping the other. Roll the apple slices together to obtain a rose. Set the rose at the center of the tart to complete the effect. Use a toothpick to adjust the rose. Preheat the oven to 160 ºC /320 ºF.
Melt the butter on low heat or in the microwave (be careful not to burn the butter). Using a brush, spread a thin layer of butter on the apple slices. Place the tart in the oven and bake for about 7-10 minutes until it slightly browns.
Remove from oven and let it cool at room temperature. Keep the apple tart in the fridge for 2-3 days in an airtight container.


2 Comments
Leave a reply:

![]()
Get updates by email
![]()


This is exquisite to look at. Beautiful presentation.
Thank you Marina! 🙂