Pirate Ship Cake (And Everything I Know About Fondant)
In the summer of 2011, my friend Merav went for a hike with friends in the Golan. Right at the beginning of the trip, she fell and broke her leg. After emergency evacuation, surgery and treatment, she had to stay at home and keep off her feet to recuperate. So she asked me to help her bake cupcakes for her birthday. Back then, I didn’t even know how to turn on an oven, but I was happy to help a friend in need.
She gave me a detailed list and sent me to “Mana Ahrona,” a bake shop in Jerusalem’s Mahane Yehuda market. I entered the store, looked around and felt lost. Shlomit, the owner, approached me with a smile and asked if my wife sent me with a shopping list. “Yes!” I answered immediately. I gave her the list with one thought in mind: what in the world is fondant!?
So I went back to Merav’s and we baked cupcakes together (or rather, she gave me orders from the couch). Then we started playing with the fondant and got our hands sticky. We created personalized fondant figures to decorate the cupcakes for each guest. We created a fish, a cello, a football and even Jesus bearing a cross. The awesome creations and our friends’ happy faces captivated me. I decided to make a fondant-decorated birthday cake for my little nephew Youssef.
He was turning three. I still remember how his face lit up when I came in with the birthday cake. He couldn’t take his eyes off the fondant monkey — until he noticed the yellow ducky on the side of the cake. So much joy in one moment. Since then I’ve prepared many cakes for festive occasions. Birthday cakes, wedding cakes, cakes for holidays and more.
…
You can make homemade fondant or you can buy it readymade. When I make cakes with fondant, there’s so much work to do that I just prefer to buy it readymade. My favorite brand is Satin Ice. It’s convenient to work with and makes for a smooth and clean result. Except one time…
A few years ago, I bought Satin Ice fondant at a local store. The fondant started to crack when I covered the cake with it. It dried too quickly although I kneaded it for a long time. After a chat with the company, it turned out the product was probably a fake. They immediately sent me replacement fondant straight from the US. When the fondant got stuck in customs, they immediately handled it. It was nice to find a company that not only stands behind its product but is willing to do that much to please a client who lives so far away on the other side of the world.
About two years ago I started this blog, and since then I haven’t worked with fondant at all. I disappeared into the world of baking. This week, my nephew (who’s not so little anymore) is celebrating his 10th birthday. In his honor, I decided to go back to fondant. This is a special day for me too. A day that marks the start of it all, when I created my first cake 7 years ago.
The theme of the birthday party: Pirates!
At first I thought of making a treasure chest cake with coins and diamonds. Then suddenly I recalled a cake-decorating contest that almost happened but never did. It was a music themed contest. I knew almost immediately what song I’d choose for my cake: The Sailor’s Lover by the Israeli singer Rita. A song so beautiful and sad with lyrics that could be well illustrated on a tiered cake: a picturesque port city with the sailor’s lover watching the sea from the window of her house, her long wavy hair wafting with the wind and merging with the stormy sea that swallows the sailor’s ship.
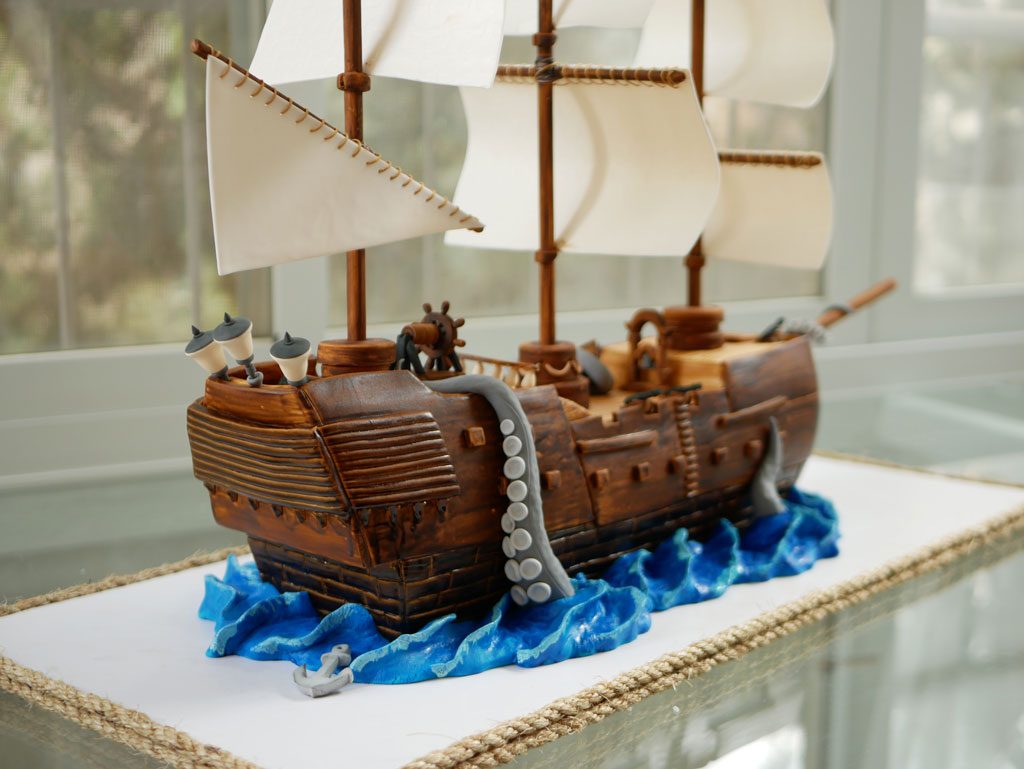
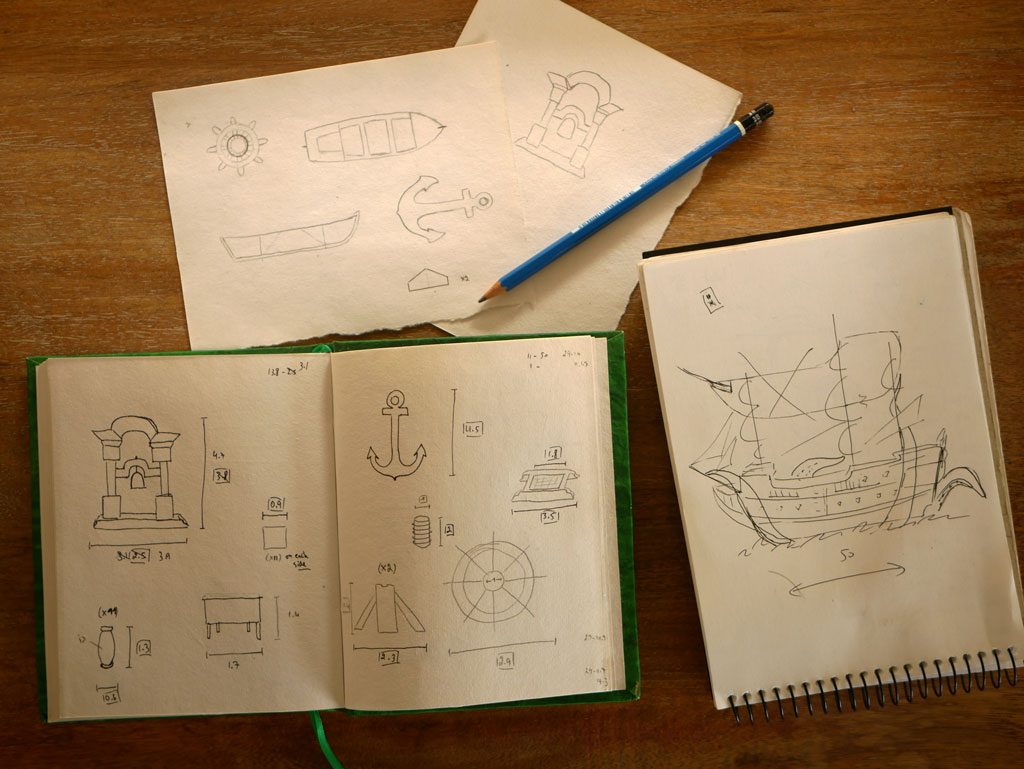
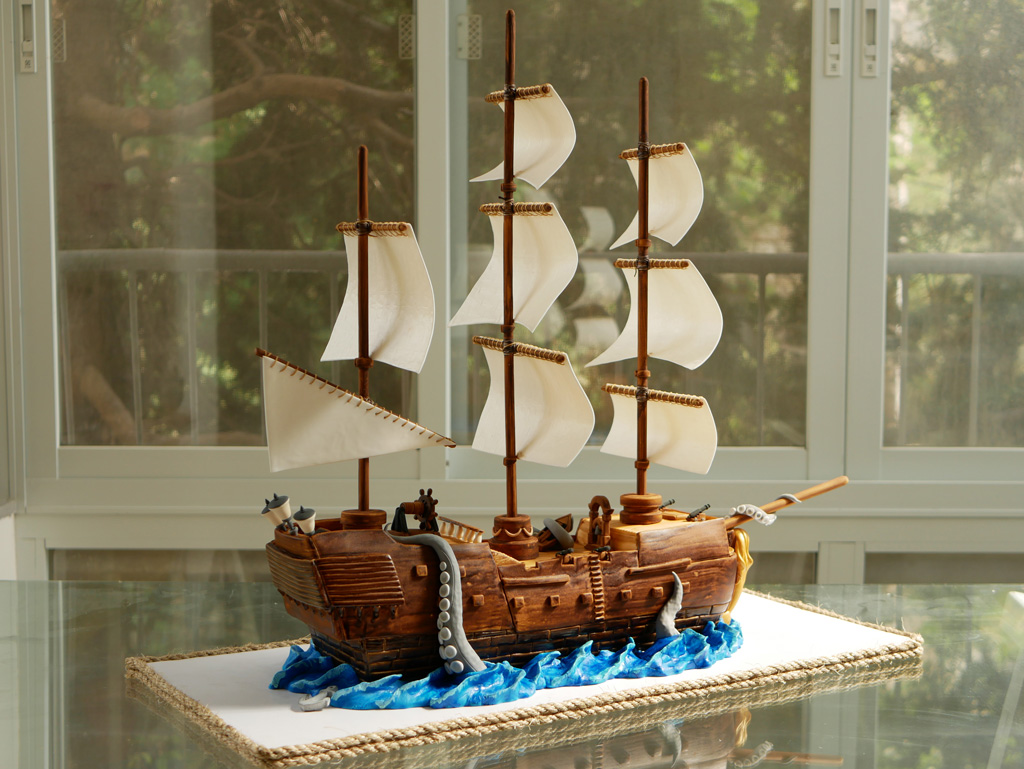
In the end, the contest didn’t take place. But the idea stuck in my mind. I decided to abandon the treasure chest and build an edible ship. So that’s what I did for the last 3 weeks. Every day I would come back home from work to work on the cake. I started with sketches in my sketchbook, calculating quantities and sizes of each tiny part. I tried to finish as much work as possible before baking the cake to keep the cake fresh for the event.
At last, the long awaited day came, Youssef’s birthday, before which I slept only 4 hours. I was exhausted. I tried to finish as much as possible before transferring the cake to the event. In the end I didn’t manage to prepare the flag with the skull and a few other small elements, but I’m very happy with the final result.
…
So were two soldiers at the military checkpoint on Route 443. While my brother and I were showing them our ID cards, they asked what the ship is made of. When I told them it was fondant one of the soldiers immediately jumped back. “What?!” One shouted. “This is cake?!” The other asked. The soldiers finished admiring the cake and let us go on our merry way, after asking for a piece of cake. Luckily it was just a joke.
The cake made it to the party safely, which is quite impressive considering the masts and the sails fluttering above it. Youssef was so happy. So were all the other children who took out their phones (umm, what?!) and started taking pictures. When it was time to cut the cake, all the children gathered around me to see if there was indeed a cake hiding in the ship. The cake was sliced, eaten and gone, just like a ship sinking in the sea. My big project for this October is over. At the end of the party, my sister dropped a table on my foot, I cut both index fingers on a bent knife, and went back home in pain… but content.
Tools
After two years of not working with fondant, I found myself lost at first. I had to work hard and remember all kinds of things I’d almost forgotten. So I decided to write everything I know about fondant in one post. This way I can always come back here and remember the important things. Here is the supply list you’ll need to cover a cake and create fondant figures:
A cake covered in ganache
Fondant
Powdered sugar / Corn flour
Margarine
Ziploc Bags
CMC powder
Strong edible glue
Medium edible glue
Large & small rolling pins
A small sharp knife
Paint brushes
Gel based food coloring
Alcohol if necessary
Toothpicks
Cake smoother
Tools for modeling
Paper towels
Foam board / cartons
Measurements
1 kg of fondant is enough to cover a round tall cake with a 22-23 cm diameter. (You can easily find conversion tables online for different cake sizes).
For the ship, I had to make measurements and figure out the size of the ship. I decided that it would be 50 cm long, so I adjusted all the measurements according to this sketch. About 2 kg of fondant was enough to cover it. In the end, the cake came out smaller than I had planned, and the parts that were placed on it were a little too big. I don’t think anyone noticed, right?
Cake board
I usually create the surface for the cake from foam board or cartons. I cut 2 or 3 larger pieces according to the size and shape of the cake. Then I attach the pieces with hot glue (I love my glue gun!). I attach a colorful ribbon around the board using a double sided tape.
For the ship, I decided that a rope would be more appropriate. So I bought a rope and attached it around the board with my glue gun. (Bang Bang!)
Cake
The best cakes to cover in fondant are pound cakes. They are durable and stay fresh at room temperature for up to a week. They can withstand the weight of fondant. In addition, they can be stacked to tiers more easily than other cakes.
I usually bake the cake about 3 days in advance. After baking, I let the cake cool completely at room temperature, then cover it with plastic wrap and keep it in the fridge for a night, especially if I plan to cut or shape the cake.
For the ship, I baked my favorite chocolate cake from a previous post. I had to change the amount of the ingredients to fit a square pan the size of 23×23 cm. To get one square cake I had to multiply the amount of ingredients by 3. I did this three times to get 3 square cakes (i.e., in terms of the final amount, I doubled the recipe by 2¼). I let the cakes cool at room temperature, then covered well with plastic wrap and kept in the fridge for a night.


Simple syrup
It’s recommended to brush each cake layer with simple syrup to keep the cake moist. The cake might get dry until the cake is covered by ganache and then fondant. Also, you can add flavors to the syrup to strengthen the flavor of the cake.
Simple syrup can be made from equal amounts of water and sugar. I usually combine a cup of water with a cup of sugar in a kettle and place it on a high heat. I stir the sugar with a spatula to dissolve it. Once the water starts to boil, I stop stirring and remove the spatula. I let the syrup simmer for another 5 minutes before removing from heat.
In fact, the syrup has a two roles. Not only does it keep the cake moist, it also allows attaching the fondant to the ganache. So, after I’m done brushing the cake with syrup, I keep the syrup on the side and later brush it on the ganache that will cover the cake.
Chocolate ganache
Chocolate ganache is my favorite cream for covering a cake. I use a 1:2 ratio in favor of chocolate. However, for the layers inside the cake, I prefer to use a lower ratio of chocolate to cream. It gives a softer ganache. Of course, the ratio varies depending on the season and the type of chocolate (or the percentage of cocoa beans).
To make the ganache, I break the chocolate into small pieces and put them in a measuring pitcher. I bring the heavy cream to a boil and pour over chocolate. I mix a little bit with a spatula and then use a hand blender to blend it to a uniform consistency. Then I then transfer the ganache into a bowl and cover the surface with plastic wrap until it’s ready to use.
How do you know if the ganache is ready? Check the texture. If it’s easy to spread and is not runny, then it’s ready. If it hardens, lightly heat it on a double boiler until it softens back.
For the ship, I used 500 grams of heavy cream and 1 kg of dark chocolate. This amount of ganache was enough to be spread as layers inside the cake and to cover the cake completely. Indeed, I used the same ratio for the layers inside the cake as for the outside cover. I wanted the masts to be held in place tight so I decided to use a more stable ganache inside as well.
Cutting and assembling the cake
After the cake has set in the fridge, I cut it across twice in equal intervals to get 3 layers of cake. I cut the cake with a cake saw or a large serrated knife. To get a straight clean cut, I keep turning the cake and cut first from the sides then slowly advance to the center of the cake.
I spread a little bit of ganache in the center of a serving plate (or the board I’ve built). I place one of the cake layers on top. Then, I lightly brush the cake with syrup. I spread a layer of ganache over the cake (about 1 cm thick). I flatten the surface with a spatula, then repeat the process for the other layers.
…
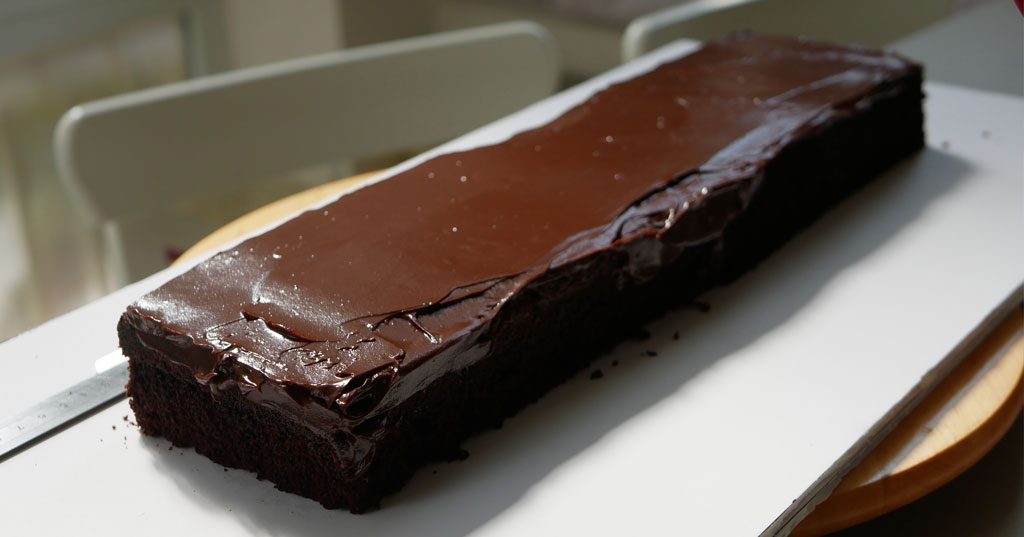
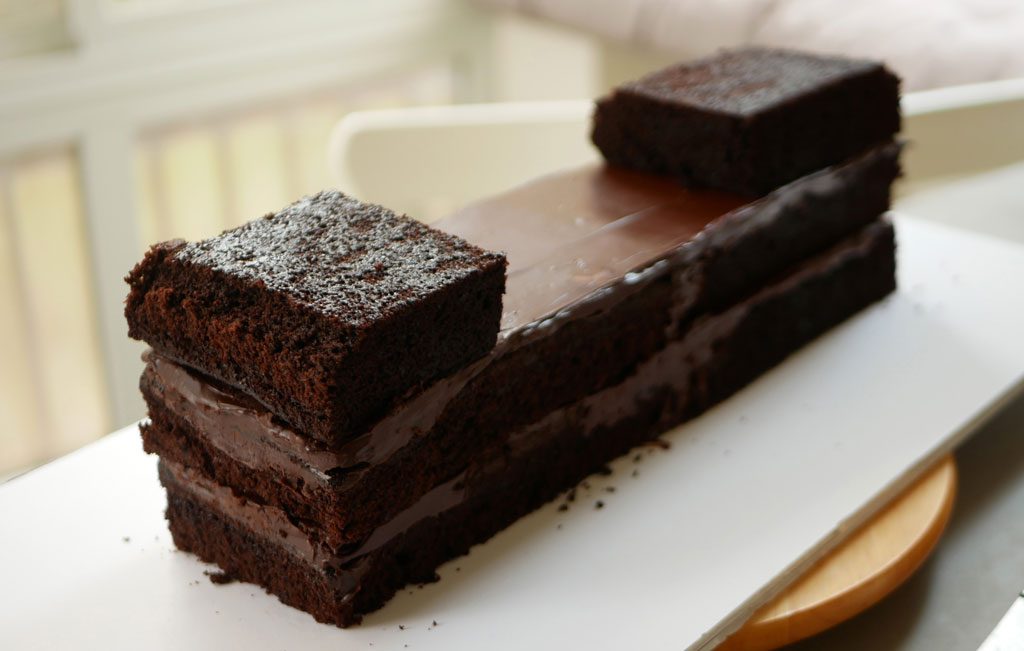
For the ship, I cut the top of the cakes to straighten them. I cut each layer of cake in the middle lengthwise and got 6 layers of 22×11 cm each. I spread some ganache along the center of the cake board.Then I placed two pieces of cake one after the other and attached them with ganache. That’s how I got the first cake layer that was about 45×11 cm. I lightly brushed the first layer of cake with syrup using a wide brush. The syrup was immediately absorbed into the cake.
I generously spread a layer of ganache over the first layer of cake (about 1 cm thick). I put another 2 pieces of cake on top. Thus I got the second layer of the cake. I brushed it with syrup and then added another layer of chocolate ganache.
I had to cut the third layer according to my measurements. The front and back of the ship are taller than the center of the ship. I cut 2 pieces of cake according to the measurements and placed one in front and one in the back. I then brushed them with syrup as well.



Sculpting the cake
My favorite part! The goal here is to make the cake look like a ship by sawing it. Using a small serrated knife, I sawed the sides of the cake until they were curved enough to resemble a ship. I sawed the front of the ship and the back of the ship so they’ll have a slight incline. There’s an empty space at the bottom of the ship’s back. I sawed that part accordingly.

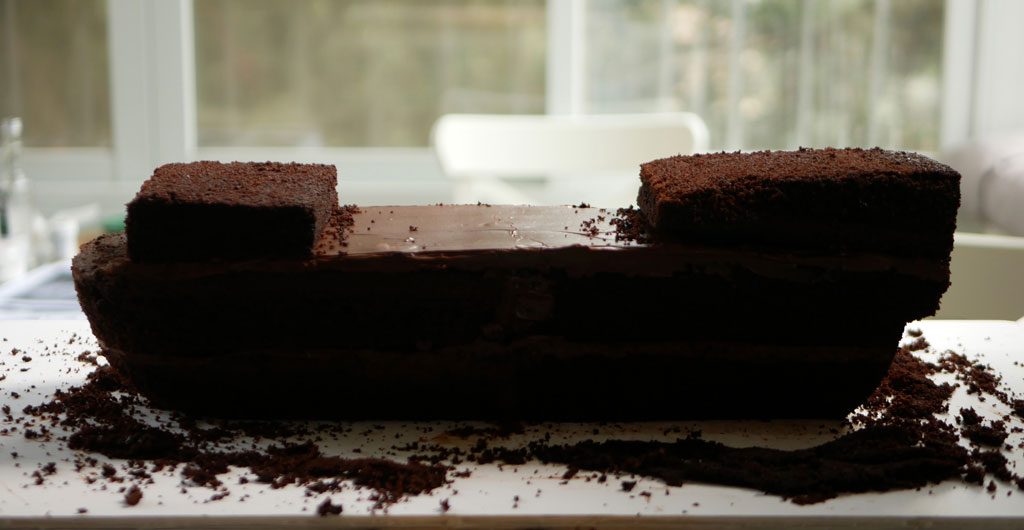
Covering the cake with chocolate ganache
I spread ganache generously around the sides of the cake. I use a cake scraper to remove all the excess buttercream. To do so, I press the scraper on the side of the cake while turning the cake around, leaving it with a smooth layer of ganache around the cake. If there are dents, I fill them with ganache and smooth them again with the scraper. I smooth the top edges as much as possible.
For the ship, I spread a first layer of ganache all around and over the cake until it was completely covered. I let the ganache set and then I spread another layer of ganache. This time I made sure all the corners are sharp and the sides are smooth. I managed to get very smooth sides by using a curved card I cut out from an x-ray. It worked like magic!

Covering the cake with fondant
Before rolling the fondant, lightly grease your hands and surface with margarine. Knead the dough for about 5-10 minutes until it softens. Sprinkle cornstarch/ powdered sugar* on a wide surface. Measure the diameter and height of the cake. Add twice the height to the diameter and you get the length to which the fondant should be rolled. Lightly brush simple syrup over the ganache that’s covering the cake.
Using a large rolling pin, roll the fondant on the surface until it’s about ½ cm thick. Keep turning the fondant and make sure it doesn’t stick to the surface. Place the rolling pin on top of the rolled fondant at the center. Fold half the fondant on it and lift the rolling pin to lift the fondant. Roll the fondant over the cake by releasing it from the rolling pin.
To attach the fondant to the cake you’ll have to work from top to bottom. First, fasten the fondant at the top of the cake. Then, gently pull the edges of the fondant away from the cake and fasten the fondant to the corners of the cake. Fasten the fondant around the cake from top to bottom. Turn the cake around and make sure the cake is covered well. Cut the excess fondant at the bottom of the cake. Smooth the fondant surface with a cake smoother.
…
Sometimes air bubbles show up on the fondant surface. Do not panic (who am I kidding, this always scares me). Take a pin and make a tiny hole in the bubble to release the trapped air. Smooth the bubble with the cake smoother. Yes, the tiny hole might remain visible (bummer), but it’s not too bad. You can always cover it with fondant decorations or change the cake design accordingly.
Once the cake is covered in fondant, there is no need to keep it in the fridge. Fondant that covers a cake completely will keep the cake fresh at room temperature for a few good days. The moisture in the fridge might damage small modeled pieces of fondant if they are present on the cake. In case you decide to keep the cake in the fridge, be aware that the fondant will start to sweat once you take the cake out of the fridge. Again, do not panic! Just let the cake do its thing and the cake will be back to normal eventually.
* The more corn flour you add, the more you risk the fondant getting dry and cracked after covering the cake. The more powdered sugar you add, the more you risk the fondant becoming horribly sweet. So please make sure not to overdo the amounts.
For the ship, I covered each part separately. I cut a piece of fondant and then attached it to the relevant part. For example, I covered the lower half of the ship with small fondant squares. Although the process was quite long, I think that it created a more realistic effect. As I covered the upper half of the ship, I left extra fondant over the deck which I immediately cut to create openings for the cannons, and so on.


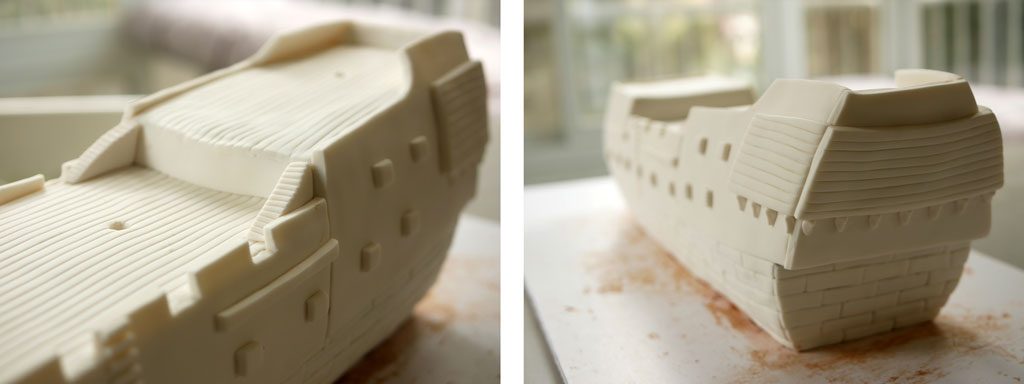
Coloring fondant
When it comes to gel-based food coloring, I usually use the following brands: Wilton and Magic Colours.
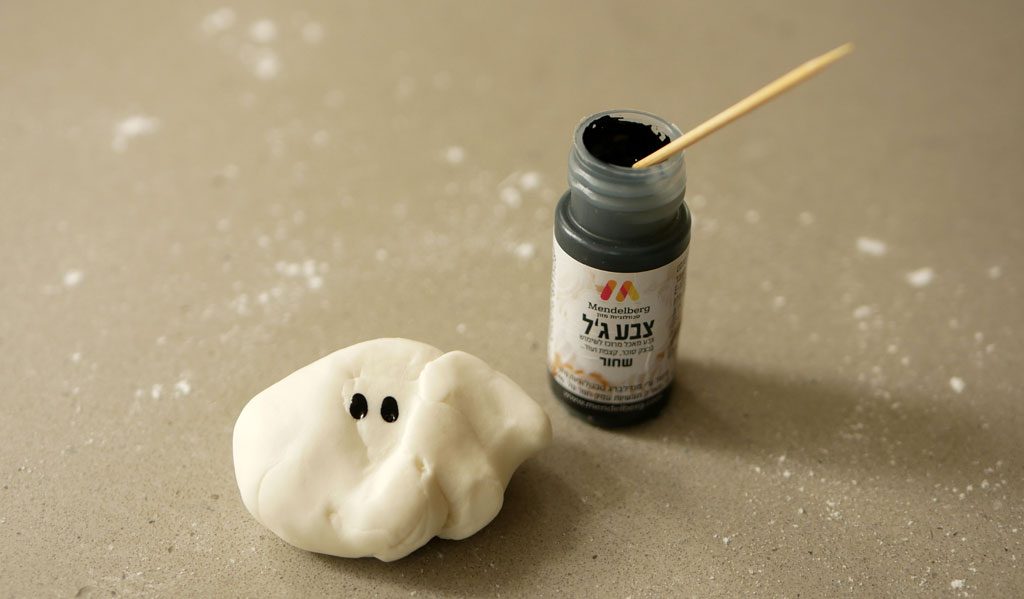
How do you color fondant? Dip a toothpick in the food coloring and apply the color on the fondant. Knead the dough until you get a uniform color. Repeat the process until you reach the desired color. If the color comes out too dark, knead the fondant with white fondant to lighten it back. In fact, it’s hard to get dark/ strong colors when you color fondant with food coloring. The final result looks like it was colored with pastel colors. Therefore, in some cases it’s better to just buy colored fondant, especially for dominant colors like red, black and blue.
Sometimes, after you color the fondant, the color starts to fade. Food colors that tend to fade quickly are mainly black and purple. This happens usually when the colors are exposed to light (especially daylight) for a long period of time. This can be prevented, more or less, if you buy colored fondant.
A note from the pharmacist: food coloring is not at all healthy. In fact, neither is sugar. I like the idea of fondant that can transform your everyday chocolate cake into a child’s dream come true. It’s amazing that this whole thing is edible. But there’s no reason to let the child eat all that sugar and synthetic color. That’s why when the time comes to cut the cake, I prefer to remove the fondant around the piece of cake I’m serving (or at least tell them not to eat that part).
Coloring the fondant in wood
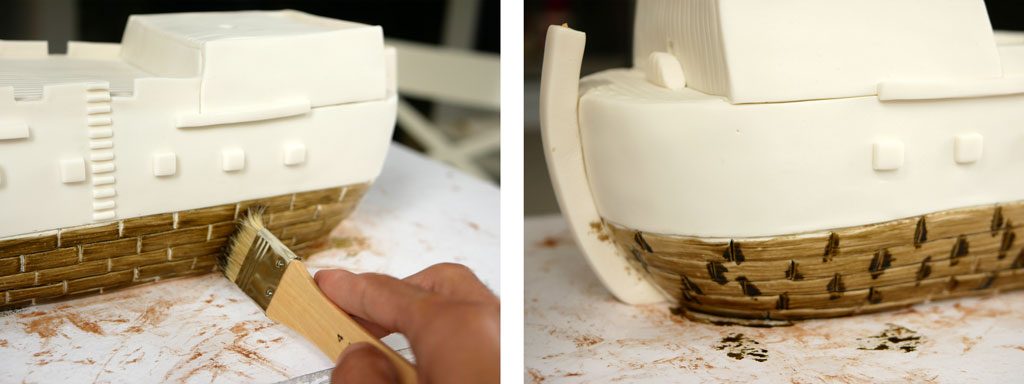
It’s a pretty neat effect I learned from this YouTube video. I have used this effect in the past to create a whiskey barrel cake for Yuval’s birthday. This was actually what drove me to make the ship. I knew the wood-like effect would look great on it.
To do this, mix a bit of brown food coloring with a bit of alcohol. Paint the fondant while moving the brush in a uniform direction to create a wood effect. Alcohol evaporates fairly quickly but the color stays on the fondant. I usually use vodka. You may also use lemon extract that contains alcohol.
When coloring the fondant, you should have 2 containers: one with diluted paint and one with concentrated paint. This way you’ll be able to play with the color and create a richer wood-like effect. If you regret the color after you have painted the fondant (as did I) you can dilute the color on the fondant by brushing it with alcohol. You may also paint over the colored fondant (I tried to paint the bottom of the ship in black but it came out greenish). This will make the color darker.
Basically, the higher the alcohol content, the quicker the color will dry. In order to speed up the drying process it’s recommended to work in a dry room, with no moisture and a little wind blowing.
…
For the ship, I used vodka for the most part. I just ran out of it too quickly. Luckily (or maybe unfortunately), Daniella came to visit and brought with her a bottle of Gurkengeist, a cucumber liqueur from Germany. The bottle contains 40% alcohol. The only drawback was the smell of pickles it spread in the air every time I used it. Luckily, it left no trace of the awful smell once it evaporated.
Because I painted the ship only a day before the event, I feared the paint wouldn’t dry in time and stay shiny and bright. So I turned on the air conditioner on dry and opened all the windows while working.


Modeling parts and figures
You can model basic figures with fondant. It’s easier to do with gum paste. Gum paste is more elastic and stable than fondant. When you model a figure from a fondant, the fondant dries quickly on the outside but stays soft inside. It’s recommended to model each part of the figure separately, let them dry for a day or two and only then attach them to each other. If the parts are attached on the same day, the figure may get cracked. Gum paste enables modeling figures in a shorter amount of time.
Another option: You can turn fondant into gum paste (sort of) by adding CMC powder – Carboxymethyl Cellulose. It’s a synthetic powder that stabilizes fondant and makes it dry faster than usual. I usually add a pinch or two of CMC powder to a handful of fondant. Then I knead the fondant to incorporate the powder. If I want the fondant to dry more quickly, I add some more CMC powder.
It’s important to work as clean as possible when it comes to fondant. At least that’s how I do it. Before I start playing with fondant, if for rolling or for modeling, I always wash my hands with soap and then wipe them dry with a paper towel instead of a regular kitchen towel. That’s how I manage to prevent textile fibers from passing to my hand from the towel and then to the fondant. These fibers just drive me nuts.
…
In addition, I like working with big ziplock bags. They are excellent for rolling small amounts of fondant. Powdered sugar is usually used for rolling. But I prefer to cut a large ziplock bag into two pieces and use one of them to roll and cut fondant as I please. This way the fondant doesn’t dry too fast, doesn’t become too sweet and doesn’t stick to the surface.
Fondant and gum paste must be sealed from air. I always make sure to store the fondant I’m not using in a plastic bag. After modeling figures and parts, I store them on a shelf in a cupboard to keep away from dust. You must never close them in a bag or in a box, otherwise the fondant will start to sweat and the moisture will destroy it.
For the ship, most of the small pieces that sit on the ship were made two or three weeks in advance. There’s no need to eat them and they function more as decoration. So, when it was time to start working on the cake itself, I didn’t have to worry about all the small details. They were mostly ready by then. When it was time to cut the cake, I simply removed the less edible parts.
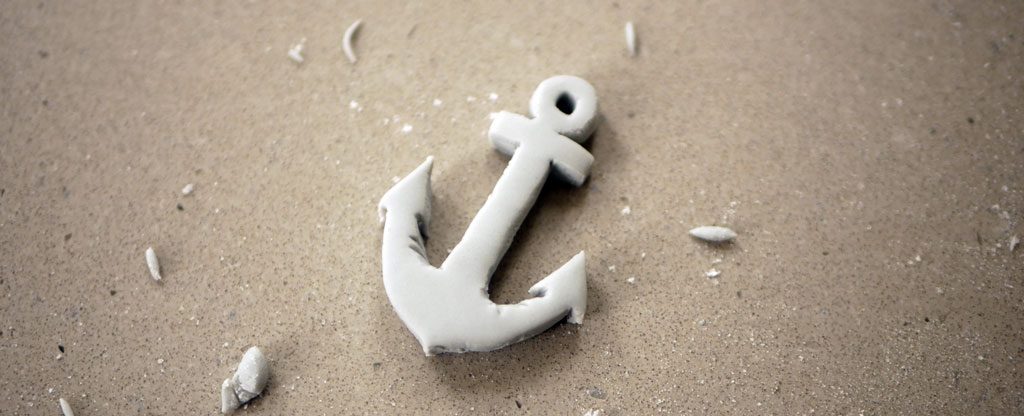
Gluing fondant
To glue parts of fondant together I use two kinds of edible glue:
Medium glue: ½ tsp powdered sugar + 1 tbsp water.
Mix together and it’s ready to use. This is mostly the glue I use, especially for attaching parts that don’t need strong adhesion. Such as eyebrows on a face.
Strong glue: ¼ tsp CMC powder + 3 tbsp lukewarm water.
Mix and keep in the fridge for at least a few hours. Before using, mix well until there are no lumps visible. I use this glue only for cases that require serious adhesion, like the handles of the ship’s steering wheel.
When I’m not using the glue, I cover it and store it in the fridge until the cake is done.
Modeling the parts on board of the ship:
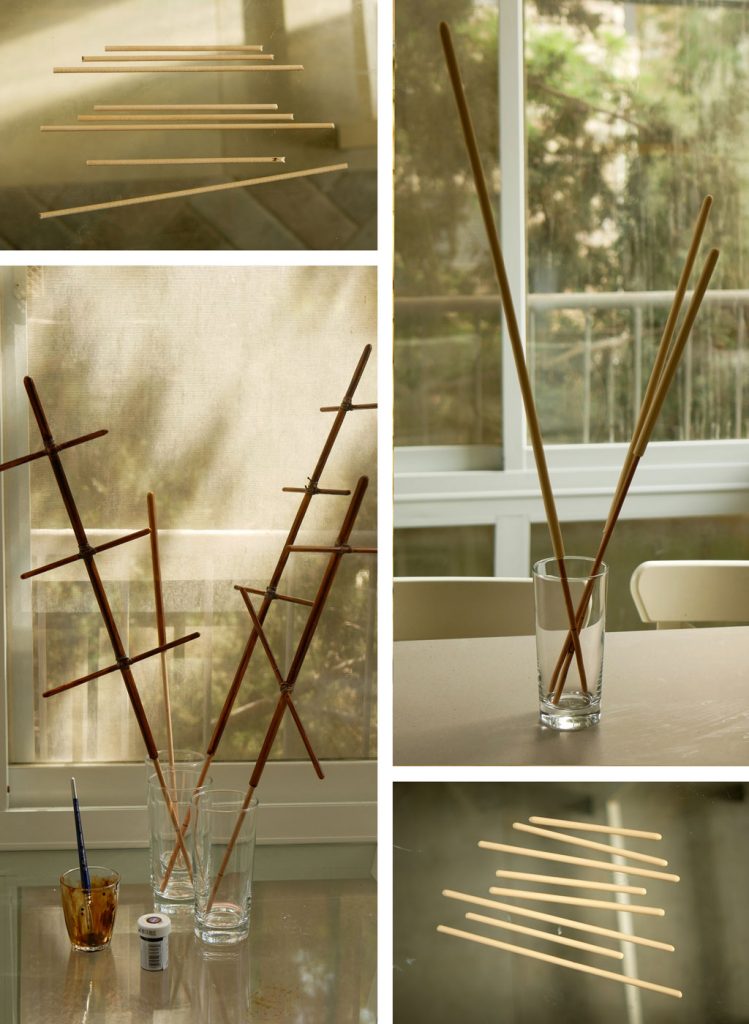
Masts
I used four wooden dowels with 6 mm diameter. Using an edible marker, I marked the part that’s going to be covered in fondant (no need to cover the part that will be inside the cake.) I rolled fondant into a rope. Then I rolled the fondant on a big Ziploc bag (non-sticky surface) using a rolling pin to a thickness of about 2 mm. I cut the rolled fondant into a long 2 cm wide strip.
I lightly brushed syrup over the fondant. Then I placed the dowel on top and gently pressed one side of the fondant along the dowel. I released it from the Ziploc bag and gently attached the rest of the fondant to the dowel. To close the gap between the edges I simply pinched the fondant gently until it covered the whole dowel. I rounded the head of the dowels. I smoothed the fondant using a cake smoother. Then I placed the mast in a tall cup full of dried chickpeas to let the fondant dry.
…
I repeated the process for the vertical beams of the mast that are going to hold the sails. I used a narrower 4 mm dowel. Then, I cut it to the desired size and covered it all in fondant.
After letting them dry for two days, I connected the beams to the masts so I could hang the sails on them. Since they were going to be over and outside the cake, I decided to use a thread to tie them together. I used a sticky wax thread and tied them in a square lashing knot based on a video I found on YouTube. (Just like a good scout!)
I added a heavy, broad base made of fondant where each mast met the surface of the cake. It helped me attach the mast to the surface and also contributed for the stability of the mast. I painted the mast in the wood-like technique I talked about above. I let them dry completely before attaching the sails.


Sails
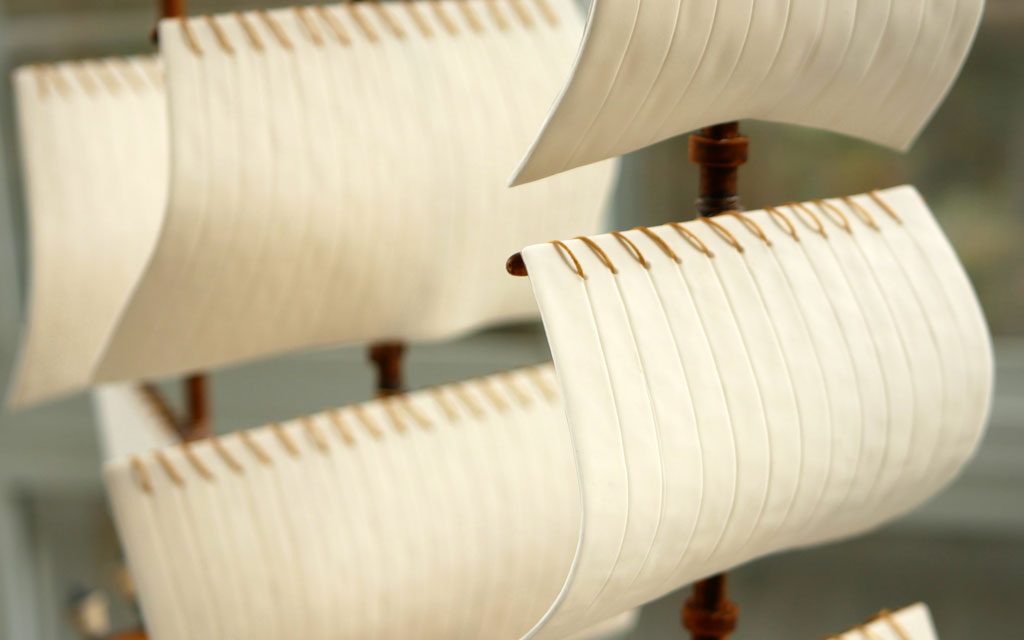
I made the sails from gum paste that I attached to rice sheets. First I cut pieces of rice sheets according to the size of the sails. Using a needle I pierced holes at 1 cm intervals along the edge that would be attached to the beam on the mast. I widened the holes using a toothpick so that I could thread a needle with a wax thread through them.
Then I rolled gum paste on the rice sheets and cut the gum paste accordingly. Using a toothpick, I pierced wide holes in the gum paste according to the holes on the rice sheets. I let them dry at room temperature overnight, while they were curved over plastic bags.
I attached the sails to the wooden beams by threading a needle with a wax thread through the holes and around the wooden beam. It held up nicely! To make sure that the sail remained curved, I added a ring of fondant to the mast near the bottom of the sail and let it dry before I painted and attached it to the sail.
In the end, there was no need to make sure the sails remained curved while drying, nor to add the ring of fondant to the mast. The sails acted like actual sails. During the day they curved, straightened, curved, and so on. Apparently the rice sheets absorb the moisture from the gum paste and then shrink and expand as they please. Luckily I used gum paste, which is more elastic than fondant and so it didn’t crack under the pressure.

Steering wheel
I inserted toothpicks in the legs to hold the wheel in place. For the handles I rolled small balls of fondant similar in size, then modeled them into droplets and flattened them at the bottom. I let them dry for a night and only then I attached them to the steering wheel. I made a cylinder with a toothpick in its center to hold the wheel on its feet.


Rescue ship
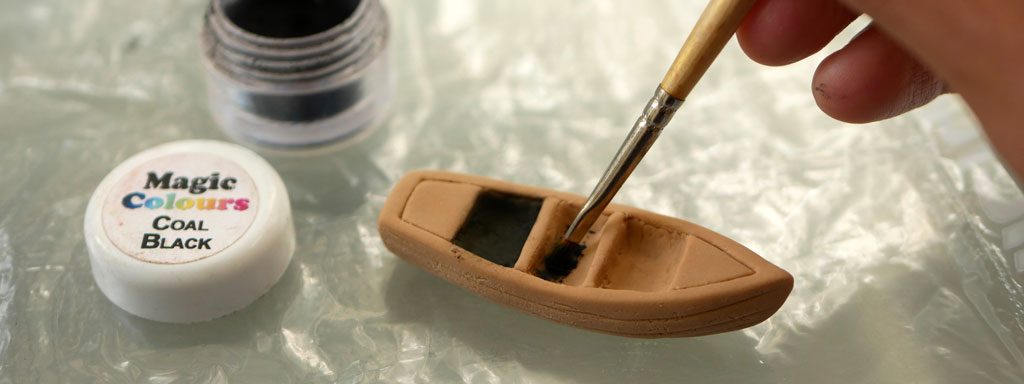
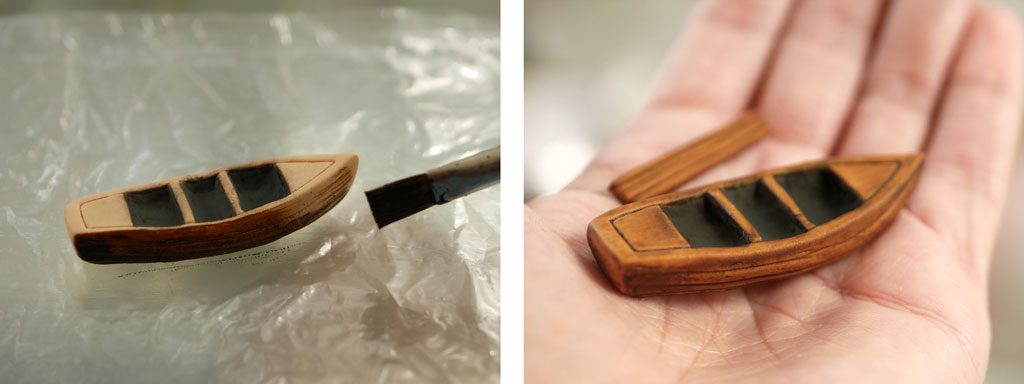
I modeled the ship from fondant. After letting it dry, I painted around the ship using the wood-like technique. I brushed the inside with edible black dust. I added the oars on top after letting them dry overnight.


Bell
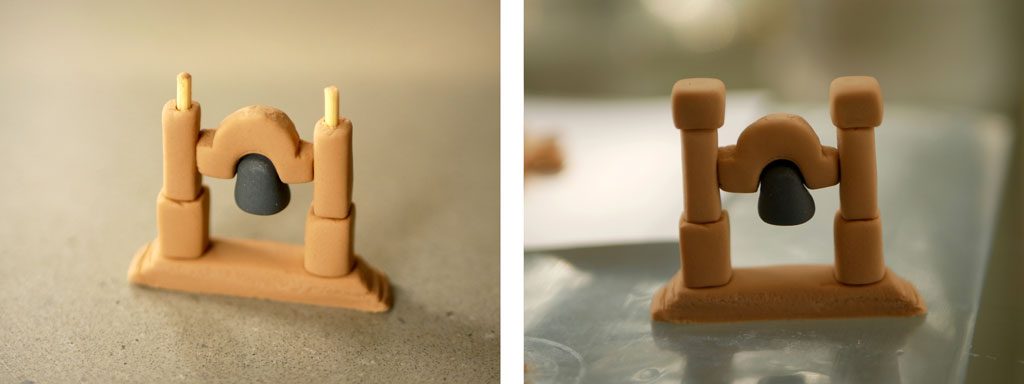
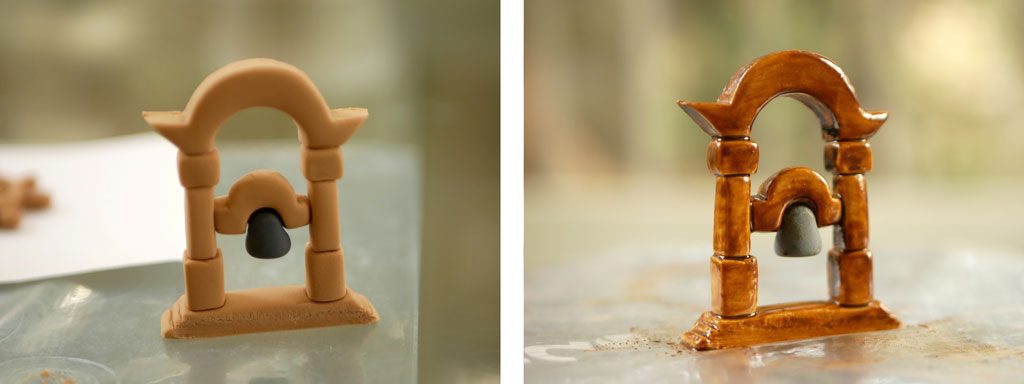
I assembled the bell frame pieces around a toothpick along each leg. I connected the bell with a toothpick to the sides as well. After letting it dry I painted the fondant using the wood-like technique around the bell.

Cannons
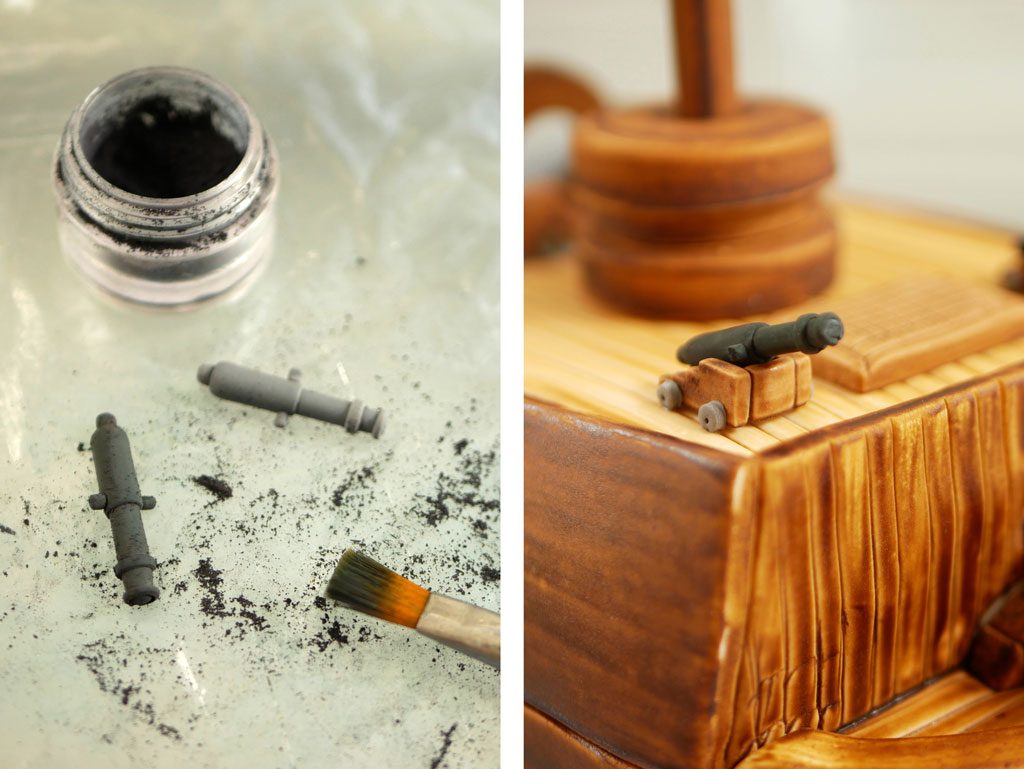
I modeled the cannons from fondant. They’re so small that they dried rather quickly. I didn’t have black fondant, so I colored the fondant gray before modeling and then brushed them with black dust powder after modeling. I painted the base wood-like and added gray wheels to the bottom.


Lamps
I modeled the lamps from fondant. I set them on a toothpick so they would keep their shape while drying. Then, I made sure the middle lamp was taller than the others.


Railing
I made the railing teeth a couple of weeks in advance, that’s why they look so big. I made the railing itself from gum paste according to the width of the deck. Then, I dried it overnight, and painted it wood-like.


Figurehead
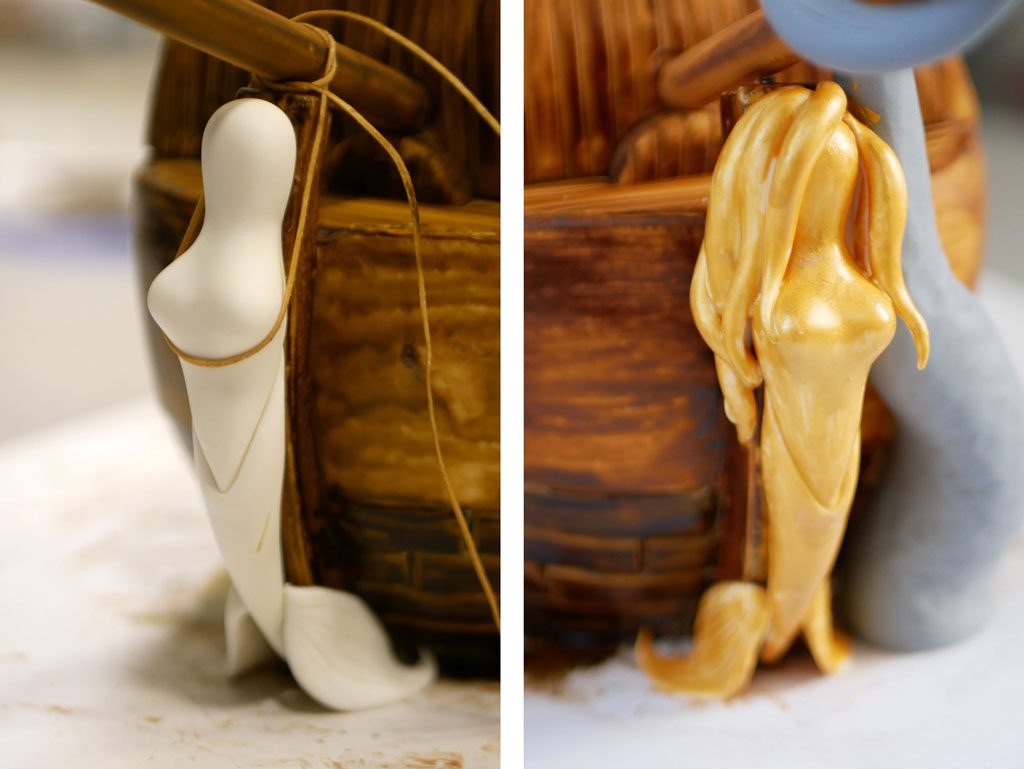
I modeled the mermaid figurehead from gum paste. I modeled the upper body first, let it dry overnight, and then added the lower body. Then, I attached it to the front and fastened it with a thread until the glue dried. I took off the thread and added the hair. After it dried I painted it in gold.
How do you paint in gold? With edible gold dust powder. Mix a bit of powder with a bit of alcohol. Paint the figure using a brush and allow the first layer to dry before adding a second and a third coat to strengthen the paint. If the gum paste is colored yellow/orange before modeling it won’t need a lot of layers to get a strong golden look.

Tentacles
I modeled the tentacles based on this YouTube video. I colored the fondant gray, rolled it into cones and attached them to the side of the ship. Then, I put a little glass under the tentacle I wanted to suspend on air so it would dry overnight. The buttons on the tentacles were colored lighter gray.

Sea
I modeled the sea based on this YouTube video (this is one of the world’s greatest fondant artists!). I modeled the sea from 1 kg of light blue fondant, but I didn’t like the bright color. So I mixed a bit of dark blue food coloring with a bit of alcohol and then I painted the sea in a deeper color of blue. I created the foam effect by mixing white paint with alcohol and coloring with a round brush just on the edges.


Related Posts
18 Comments
Leave a reply:Cancel reply

Search the blog
![]()
Get updates by email




I don’t think the title of your article matches the content lol. Just kidding, mainly because I had some doubts after reading the article.
Thank you for such a comprehensive post. Your work is spectacular! Using your cake as an inspiration, I just made my son a ship cake. His mind was blown😁.
Thank you, Chelsea 🙂
And wow, lucky boy! I’m sure he was over the moon
This was EXTREMELY helpful – thank you so much!! I’m just about to make a ship cake and I’m so glad I read your post!!
This makes me so happy to hear!
Good luck with your ship cake 🙂
[…] Cake Lab, 19-21. Sweet Heather Anne | Vogue […]
❤️
The cake is absolutely amazing. Thank you very much for sharing with us.
My pleasure, and thank you! 🙂
Thank you love the instructions and cake. The only thing i would add, is lots of fondant molds (like on cakes – Royal ships) painted gold on back and side front of ship and a carved half woman on the front of the ship. It would take it to another level
ps. i LOVE YOUR CAKE, here is a link to another spectacular Pirate cake, and it has the GOLD stuff on it i was talking about. ps. saw your pic on your page.. owww mumma, somebody throw a bucket of cold water over me..! haha smexy chef! oh la la.. 🙂 https://www.youtube.com/watch?v=j0wyUoj4nF0
Hehe, thank you Lola!
Yener’s cakes are inspirational and I wish I had time to add more golden details, but I had a time frame and the cake needed to be delivered to the birthday boy. He was excited about it nonetheless 😉
Wow! I stumbled across this on Pinterest. That cake is incredible!
Thank you Judith! ☺
F.11.22.2019
Simply a superior and a most handsome work of a majestic ship by Cake Master, Pastry Chef Hussein!
Thank you so much for sharing your masterpiece with us!
Adore and love all of your works! Continue with all perseverance!
Ship Ahoy with the Great El Shaddai!
Jubilee Chang
Ahoy matey!
Thanks so much, you made me blush 😉
I stumbled across your pirate ship while searching for an easy (haha) way to make a ship birthday cake. What a piece of art, absolutely amazing! Thank you so much for sharing, I love the detailed pictures of the process!
Hey Alaska!
Thank you for your kind words and thanks for scrolling through 🙂